Basic Security Groups
Lesson 9
What is a security group? Before, we said a security group is like a firewall and it is, but perhaps an even better metaphor involves something we are all familiar with: a house.
Think of your EC2 instances (and other resources in AWS) like stuff inside your house: computers, the stove, toothbrushes - anything really! Security groups are like the rules your parents set when you were a kid about what you (and others!) were and were not allowed to touch.
- For example, a
ruleyour parent might have had was that kids weren’t allowed to touch the stove, but adults were. - Another
rulemight have been that you and only you were allowed to use your toothbrush. - Yet another
rulemight have been that you were allowed to use the computer, but only if you used it in a public space.
A security group is a resource in AWS that defines rules for what is (and isn’t) allowed to interact with your resources and how they are (or aren’t) allowed to do so.
If you assign your EC2 instance to a security group, then the rules that security group has will apply to your EC2 instance. Here are some examples:
- A rule that says only your computer can interact with the EC2 instance.
- A rule that says anyone can interact with the EC2 instance, but only if they are using
SSH. - A rule that says it can be accessed by anyone over the internet (public).
Basically, there are all kinds of rules you can have for your security groups to protect the different resources in your account. We will be presenting the best-practice ways to set up security groups and rules so that your resources are always protected. We are not presenting the only way to set up security group rules, and you will have cases where clients might need you to create custom rules or rules for specific resources. Once you know the basics, you’ll be able to figure out the rest as it comes up.
Table of contents
Create a Security Group Resource
Now that you understand what a security group is, let’s add one to your terraform project! Open up your ec2-terraform project in you code editor as well as a terminal window.
- Create a file called
security_groups.tfin your mainec2-terraformproject directory (the same directory with yourec2.tf). - Open up the new file in your
code editor. - Paste the following code block into the
security_groups.tffile. We will examine each line and what it means.
resource "aws_security_group" "allow_internet_traffic" {
  name        = "allow-internet-traffic-security-group"

  ingress {
    description = "Inbound insecure internet traffic"
    from_port   =
    to_port     =
    protocol    = ""
    cidr_blocks = [""]
  }

  egress {
    from_port   = 0
    to_port     = 0
    protocol    = "-1"
    cidr_blocks = ["0.0.0.0/0"]
  }

  tags = {
    Name = "allow_tls"
  }
}
The resource
Let’s start with the first line: resource "aws_security_group" "allow_internet_traffic" {. Terraform resource blocks always start with resource followed by the type of resource, in this case, a security group. Both resource and aws_security_group cannot change. Terraform needs both of those values in order to deploy the security groups resource.
Next, you’ll see "allow_internet_traffic". This is the terraform name of your security group. It is how you’ll refer to it later in this project. You can change this. Instead of allow_internet_traffic, change this to: yourname-security-group.
Ingress rules
The next line is actually a block - an ingress rule block. Ingress rules define what traffic is allowed into the security group.
description- string - can be anything you’d like. The description here is"Inbound insecure internet traffic". We know from this description that it is an ingress rule (inbound) and that the port will be forinsecureweb traffic.- For this ingress rule, leave the
descriptionas it is in the example above.
- For this ingress rule, leave the
from_port/to_port- number - a range of ports the traffic is served over. In most cases, thefromandtoport will be the range, because you will only need traffic served over a single port, but in some cases you might need to specify afromandtoport that are different. That will be covered later.- For this ingress rule, we want to serve insecure internet traffic, so we will specify port
80for both fields.
- For this ingress rule, we want to serve insecure internet traffic, so we will specify port
Note: There are many ports used to direct different types of traffic. Most of the time, you can google these ports but there are a few you should memorize:
port 80- insecure (http) internet traffic.port 443- secure (https) internet traffic.port 22- ssh traffic.port 0- in Terraform, you can specify a port range of0 to 0that means all traffic can enter, through any port. If you specifyfrom_portandto_portas0, you will also need to use the protocol:"-1"which, in Terraform, means,all protocols.
protocol- string - the most common protocol for the web istcp. You will usetcpfor each of the above ports. You can read more about the tcp protocol here.cidr_blocks- list of strings - if you remember, you can think of anIP addresslike the latitude and longitude of a location (a specific point on a map).Cidr blocksare then like a range of addresses, meaning an area of locations on a map. When we specify thecidr_blocksparameter for a security group, we are telling it where the traffic can originate from (ie, can the traffic come from just any computer? Or only my computer? Your computer?). We’ll delve into more detail in theVPCsection, so for now just know that cidr blocks are like a range of addresses, and thecidr_blocksparameter is a list of cidr blocks. The string value"0.0.0.0/0"meansall addresses, ie, traffic can come from anywhere. If you only want to allow access to one (or a specific list of)ip addresses, enter each of them as string values andappend **/32**to the end. For example, let’s say myip addressis:96.8.168.51. I would enter this ip address as:cidr_blocks = ["96.8.168.52/32"0].- For this ingress rule, we want traffic to be allowed to come from anywhere, so enter
["0.0.0.0/0"]as the value forcidr_blocks.
- For this ingress rule, we want traffic to be allowed to come from anywhere, so enter
Egress rules
The egress rule block is much simpler than the ingress rule block and specifies what traffic is allowed to exit the security group (outbound traffic). Most, if not all, of the time you will have a single egress rule allowing all outbound traffic. The rule will look like the one in the example above.
The from_port and to_port will both be 0 to denote that traffic can leave via any port, and the protocol will be "-1", to designate that any type of traffic is able to leave. The cidr_blocks section will also always be the list of strings value: ["0.0.0.0/0"].
Run terraform apply
Now that you have a basic security group configured, we want to apply our changes to AWS. When you run terraform apply from your ec2-terraform directory in the terminal, you will be deploying:
- Two
EC2instances. - One
security groupwith a singleingress(inbound) andegress(outbound, described in a later section) rule.
Go ahead and run terraform apply in your terminal, then log in to AWS and find your security group resource. Make sure it has a rule with the port 80 open to all traffic (or the cidr block 0.0.0.0/0).
Add a secure internet rule
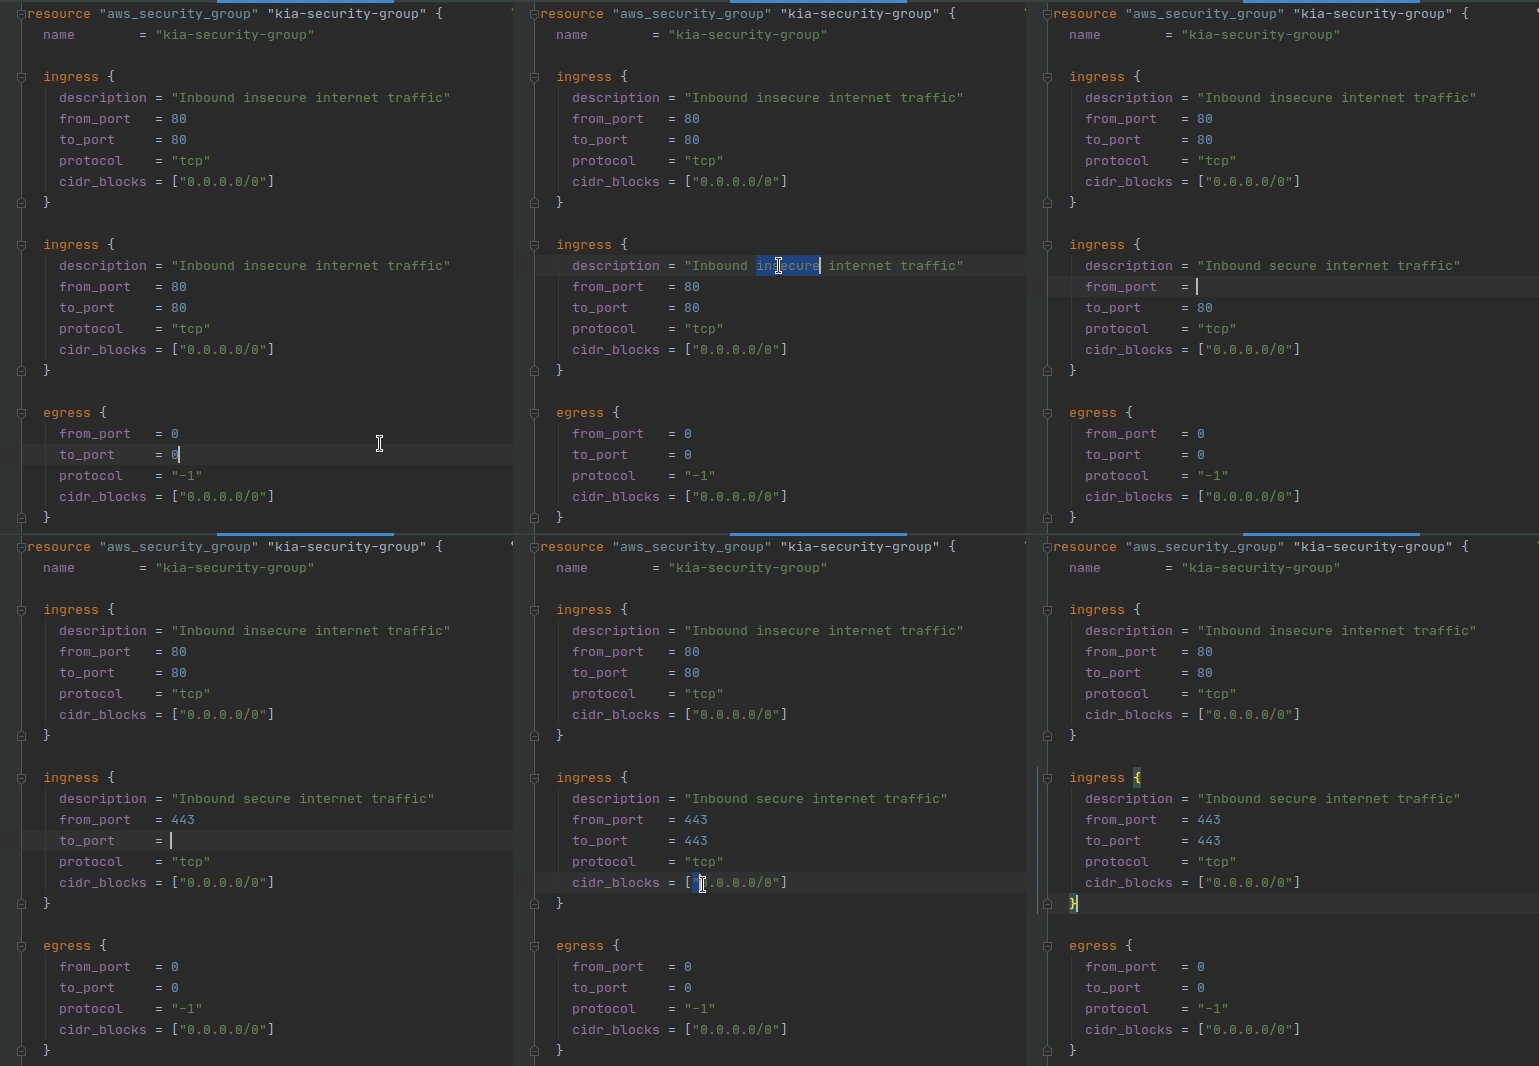
Now that you know all the parameters for an ingress rule, and you’ve seen it in action in AWS, let’s add another one! Copy the ingress rule block and paste a new ingress rule below the first one.
Now you need to decide the correct values for the new ingress rule you just added. Here’s what we want the rule to be for:
- We want it to allow secure internet traffic
- We want it to allow traffic from anywhere
See if you can fill out the description, from_port / to_port, and cidr_blocks fields so that they form a rule to match the above guidelines. Expand the section below to check your work!
Check
The new ingress rule should be in between the current ingress rule block and the egress rule block. If you are having trouble, make sure your { } are in the correct places. 
Add an ssh rule
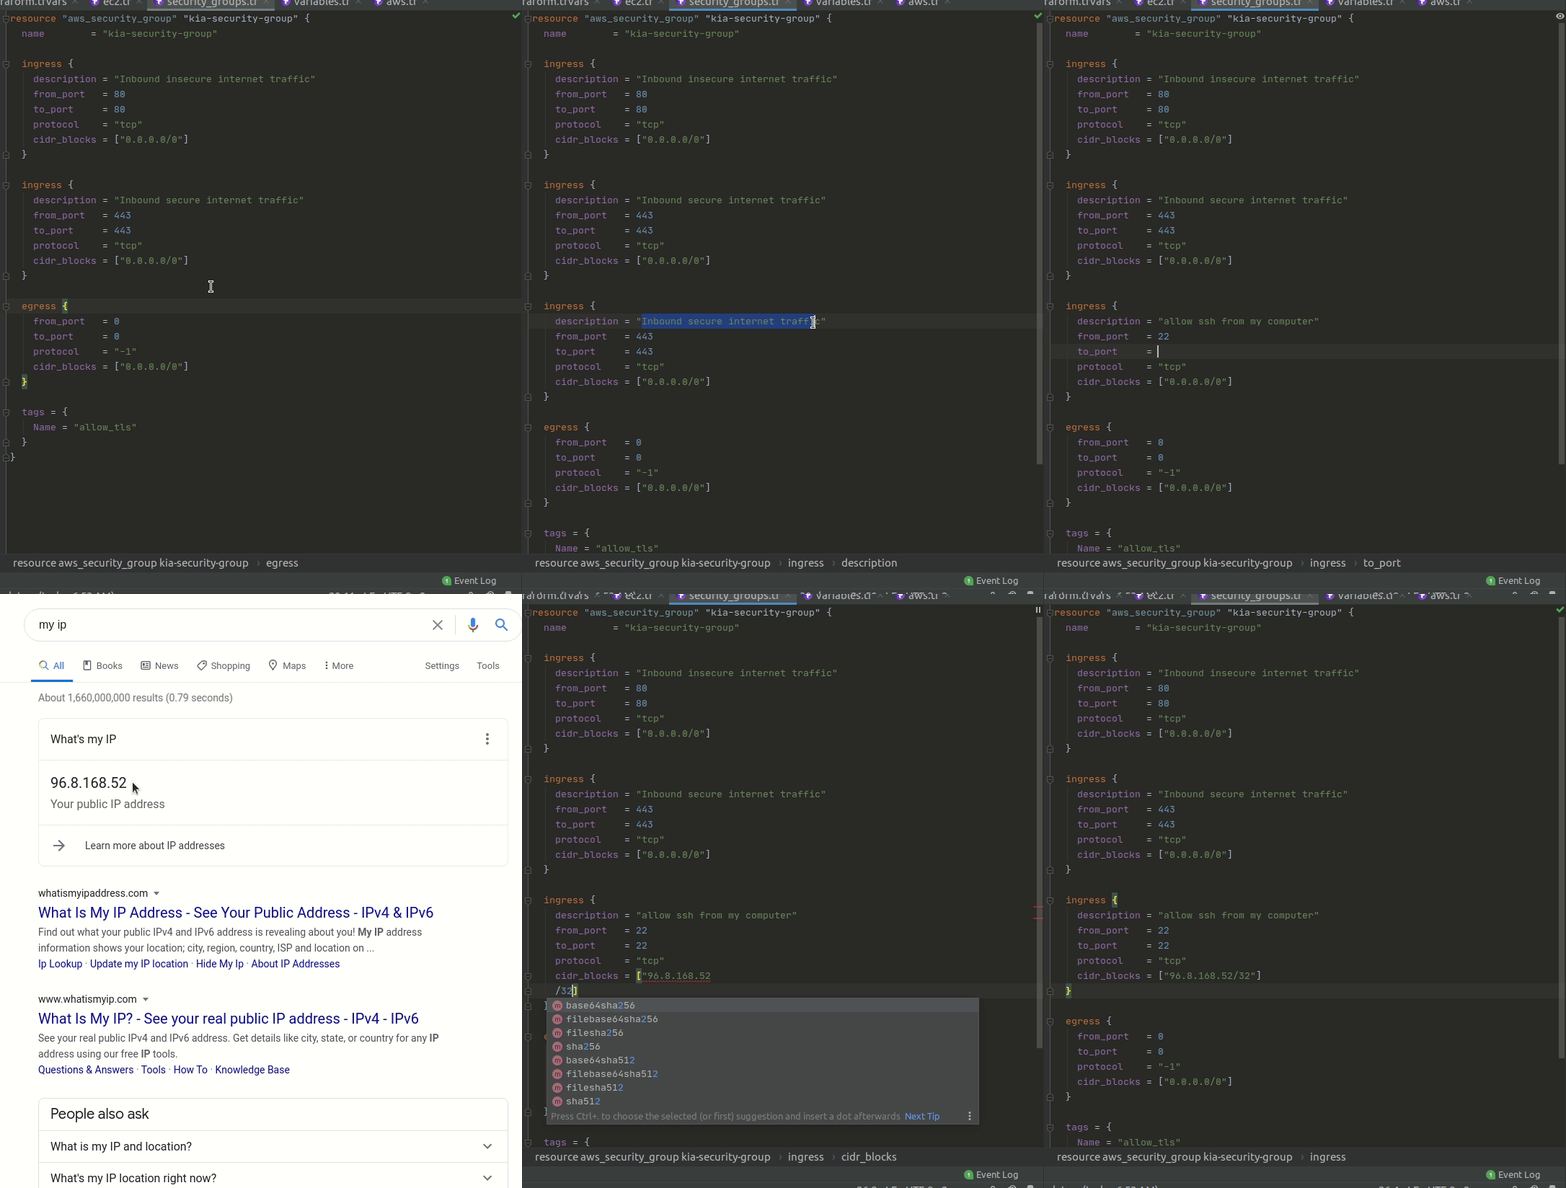
Lastly, repeat the step above but this time, create a rule that:
- Allows
sshaccess from your computer’sip addressonly.Hint: To find your computer’s ip address, search for
my ipin google. Don’t forget to add the/32when you enter it as a cidr block value in your terraform!
Expand the section below to check your work!
Check
The new ingress rule should be in between the current ingress rule block and the egress rule block. If you are having trouble, make sure your { } are in the correct places. 
Tags
The tags object is exactly like the tags section we added to our EC2 instance in a previous lesson. Tags will be added to your resources in AWS to make them easy to find and organize.
- Copy and paste the tags section from your EC2 instances.
- Update the
Nametag. Change thevaluetofront-end-security-group.
Run terraform apply
Now that you’ve added a couple more ingress rules, go ahead and run terraform apply again.
Note: Running
terraform applybefore destroying will update the resources that were created when you applied the first time. Terraform will go find the security group it already created for you above and add the two rules (and tags!) that are now present. Make sure you runterraform applyfrom theec2-terraformdirectory!
Log back in to AWS and find your security group resource. Make sure it now has three rules: one rule with the port 80 open to all traffic (or the cidr block 0.0.0.0/0), one rule with the port 443 open to all traffic, and an ssh rule on port 22, open to only traffic from your computer’s ip address.
Run terraform destroy
It’s always best to clean up your work by running terraform destroy from your project directory in the terminal.
Next Steps
You now know what a security group is and how to define what can enter and exit it with security group rules. You know more about the common ports, protocols, and cidr blocks and can use them in your terraform project. How you feel about the basics of security groups (and how confident you feel with the information in this lesson) determines what you should do next.
Redo the lesson (optional)
If you don’t feel as comfortable as you’d like with the above lesson, you can start over.
- From your
ec2-terraformdirectory, run the command:rm -rf security_groups.tf. - This will remove the entire file from your project, and you can start over at the beginning of the lesson.
Move On
Once you understand:
- What a security group is
- What ingress and egress rules are, and how to add more of them in terraform
- The port for insecure internet traffic
- The port for secure internet traffic
- The port for ssh traffic
- Basic understanding of what a cidr block is and how to use it in terraform
- The two different protocols we implemented (
"tcp"and"-1") and what they mean
You should feel confident moving on to the next lesson, Intermediate Security Groups