AWS Account Setup
Lesson 3
Time to get your AWS account! This is where the real fun begins. AWS offers a generous free tier that lets you experiment with cloud services without breaking the bank. We’ll set up your account securely and get you ready to deploy your first resources.
Already have an AWS account configured? You can skip to Terraform.
Table of contents
- AWS Account Setup
Step 1: Create Your AWS Account
AWS offers a 12-month free tier with plenty of resources to learn and experiment.
- Go to AWS Sign Up
- Click “Create a new AWS account”
- Follow the setup wizard:
- Enter your email and choose a strong password
- Select “Personal” account type (you can change this later)
- Enter your contact information
- Add a credit card (required, but you won’t be charged if you stay within free tier limits)
- Verify your phone number
- Select the “Basic Support - Free” plan
💡 Pro Tip: Use a dedicated email address for your AWS account. This makes it easier to manage notifications and secure your account.
Need more help? Check out AWS’s detailed account creation guide.
Step 2: Secure Your Account (Critical!)
Your AWS account can create resources that cost money, so security is paramount. Let’s set up proper access controls.
Create an Admin Group
Groups help you manage permissions for multiple users. Even if you’re the only user, this is a best practice.
- Sign in to the AWS Console
- In the search bar at the top, type “IAM” and select it
- In the left sidebar, click “User groups”
- Click “Create group”
- Name your group:
Administrators - In the permissions section, search for and select:
AdministratorAccess - Click “Create group”
Create Your Admin User
Never use your root account for daily tasks. Let’s create a dedicated admin user:
- In IAM, click “Users” in the left sidebar
- Click “Add users”
- Username:
your-name-admin(e.g.,jane-admin) - Check “Provide user access to the AWS Management Console”
- Select “I want to create an IAM user”
- Choose “Custom password” and create a strong password
- Uncheck “Users must create a new password at next sign-in”
- Click “Next”
- Select “Add user to group” and choose your
Administratorsgroup - Click “Next”, then “Create user”
Generate Access Keys for CLI Access
To deploy resources from your terminal, you need programmatic access:
- Click on your newly created user name
- Go to the “Security credentials” tab
- Scroll to “Access keys” and click “Create access key”
- Select “Command Line Interface (CLI)”
- Check the confirmation box and click “Next”
- Add a description: “Local development”
- Click “Create access key”
⚠️ IMPORTANT: Security Alert!
- Copy your Access Key ID and Secret Access Key NOW
- You’ll never see the secret key again after this page
- Store them temporarily in a secure location (we’ll configure them properly soon)
- NEVER commit these keys to GitHub or share them with anyone
Step 3: Install the AWS CLI
The AWS CLI lets you manage AWS services from your terminal—essential for infrastructure as code.
Mac Installation
Open your terminal and run:
# Download and install
curl "https://awscli.amazonaws.com/AWSCLIV2.pkg" -o "AWSCLIV2.pkg"
sudo installer -pkg AWSCLIV2.pkg -target /

# Verify installation
aws --version
Linux Installation
# Download and install
curl "https://awscli.amazonaws.com/awscli-exe-linux-x86_64.zip" -o "awscliv2.zip"
unzip awscliv2.zip
sudo ./aws/install

# Verify installation
aws --version
Windows Installation
- Download the AWS CLI MSI installer
- Run the downloaded file and follow the installation wizard
- Open a new Command Prompt and verify:
aws --version
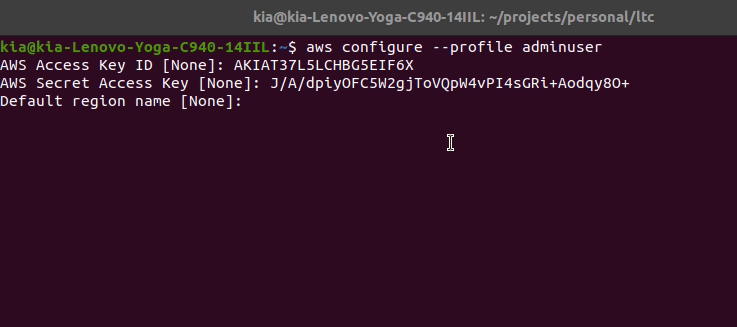
Step 4: Configure Your AWS Profile
Now let’s securely store your credentials so your terminal can access AWS:
- In your terminal, run:
aws configure --profile learn-aws - Enter the following when prompted:
- AWS Access Key ID: [Your Access Key ID from earlier]
- AWS Secret Access Key: [Your Secret Access Key from earlier]
- Default region name:
us-east-1(or your preferred region) - Default output format:
json
Verify Your Setup
Test that everything works:
# List S3 buckets (should return empty list or your buckets)
aws s3 ls --profile learn-aws

# Get your account ID
aws sts get-caller-identity --profile learn-aws
Set Your Default Profile (Optional)
To avoid typing --profile learn-aws every time:
export AWS_PROFILE=learn-aws
Add this to your shell configuration file (.bashrc, .zshrc, etc.) to make it permanent.
Security Best Practices
Now that you’re set up, follow these security rules:
- Enable MFA (Multi-Factor Authentication)
- Go to IAM → Users → Your admin user
- Security credentials tab → “Assign MFA device”
- Use an app like Google Authenticator or Authy
- Set up a billing alert
- Search for “Billing” in the AWS Console
- Set up a budget alert for $10/month
- This warns you before any surprise charges
- Delete your saved credentials
- Now that AWS CLI is configured, delete any temporary files where you saved your keys
- The credentials are now safely stored in
~/.aws/credentials
- Review the free tier limits
- Bookmark the AWS Free Tier page
- Common free tier services: EC2 (750 hours/month), S3 (5GB storage), RDS (750 hours/month)
Troubleshooting Common Issues
“Invalid credentials” error:
- Double-check your Access Key ID and Secret Access Key
- Ensure you’re using the correct profile:
aws configure list --profile learn-aws
“Access denied” errors:
- Verify your user is in the Administrators group
- Check that AdministratorAccess policy is attached to the group
Can’t find IAM in the console:
- Make sure you’re in the right region (IAM is global, but check the top-right corner)
- Try using the direct URL: https://console.aws.amazon.com/iam/
What You’ve Accomplished
✅ Created a secure AWS account with free tier
✅ Set up proper IAM users and groups
✅ Installed and configured AWS CLI
✅ Implemented security best practices
You now have a properly secured AWS account ready for deploying cloud resources!
Next Steps
With your AWS account ready, it’s time to learn Infrastructure as Code. Head over to Terraform to start building your first cloud infrastructure!