Create a Web Server
Lesson 2
Explanation with metaphor about what SSH is. Basic, high level info about root user v ec2-user.
For a hands-on approach to SSH, we are going to turn your EC2 instance into a web server.
There are multiple ways to turn your EC2 instance into a web server. We are going to go through two ways: a) SSHing into the instance and running the commands directly, and b) adding the commands to our terraform code to take a lot of the manual work out of it. We suggest doing both! The more manual way (while you won’t use it often in this course) gives you a great introduction into running terminal commands on your EC2 instance, and allows you to actually see how to SSH.
Table of contents
- Create a Web Server
- Update your security group rules
- Let’s make a web server - SSH
- Let’s make a web server - Terraform code
- Next Steps
Update your security group rules
For this lesson, you will be working in the AWS console. AWS provides a nifty tool that allows you to SSH into your EC2 instance easily. From there, we will be setting up the EC2 instance as a web server, so that you can see changes in your browser.
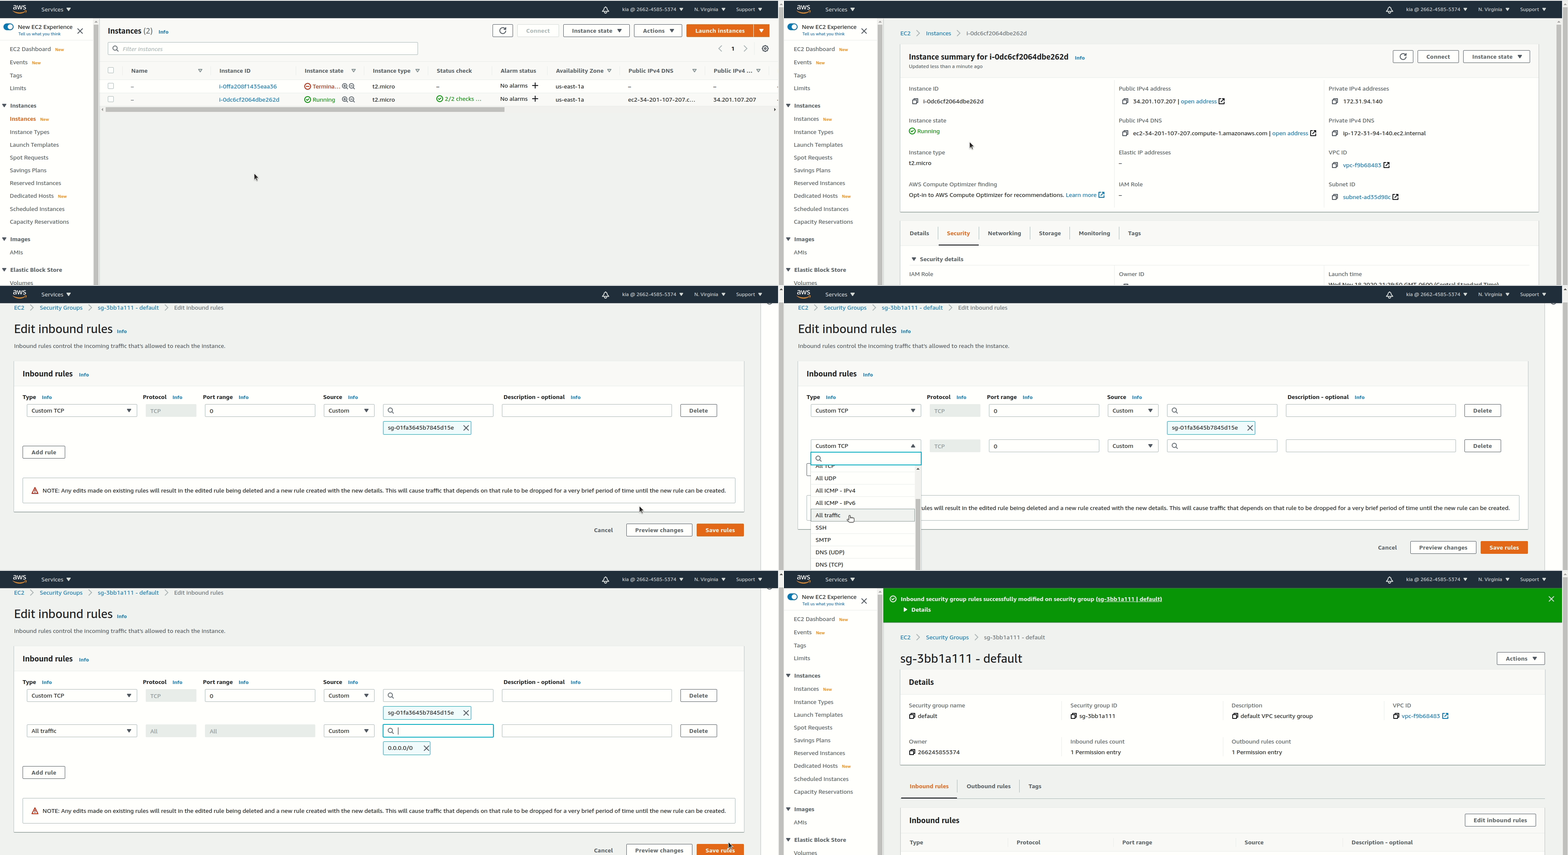
First, though, you will need to open up you security group (think of a security group like a firewall, and we want to allow everything in for now). You’ll learn more about security groups later, so just follow along with the steps and don’t worry about memorizing everything.
- Log in to the AWS console.
- Navigate to the EC2 console (Click
Servicesin the top left –> Search forEC2). - Click on
Instancesfrom the left-hand pane, or from the mainEC2screen. - Click the link to the
Instance ID. - Click the
Securitytab, then click the link to the security group underneathSecurity groups. - Under
Inbound rules, clickEdit inbound rules. - Click
Add rulewith the following parameters:- For
Type- ChooseAll traffic - For
Source- Choose0.0.0.0/0(this is acidr block, which you will learn about later. This cidr block means to all traffic from anywhere (any computer, site, etc))
- For
- You can also delete any rules other than the one you just added, but it isn’t necessary.
- Click
Save rulesin the bottom right.
Let’s make a web server - SSH
This is the more manual way to create an EC2 web server. You will SSH into the EC2 instance and run commands that download and update packages that make it possible to serve data through the web.
Run terraform apply
If you ran terraform destroy like we suggested at the end of the last lesson, you’ll now need to run terraform apply from your ec2-terraform project directory again. This will launch a new EC2 instance into your AWS account. For full instructions, you can go back to the previous lesson and review.
SSH into your EC2
Because your security group (or firewall) is allowing all internet and SSH traffic, you can SSH into your instance.
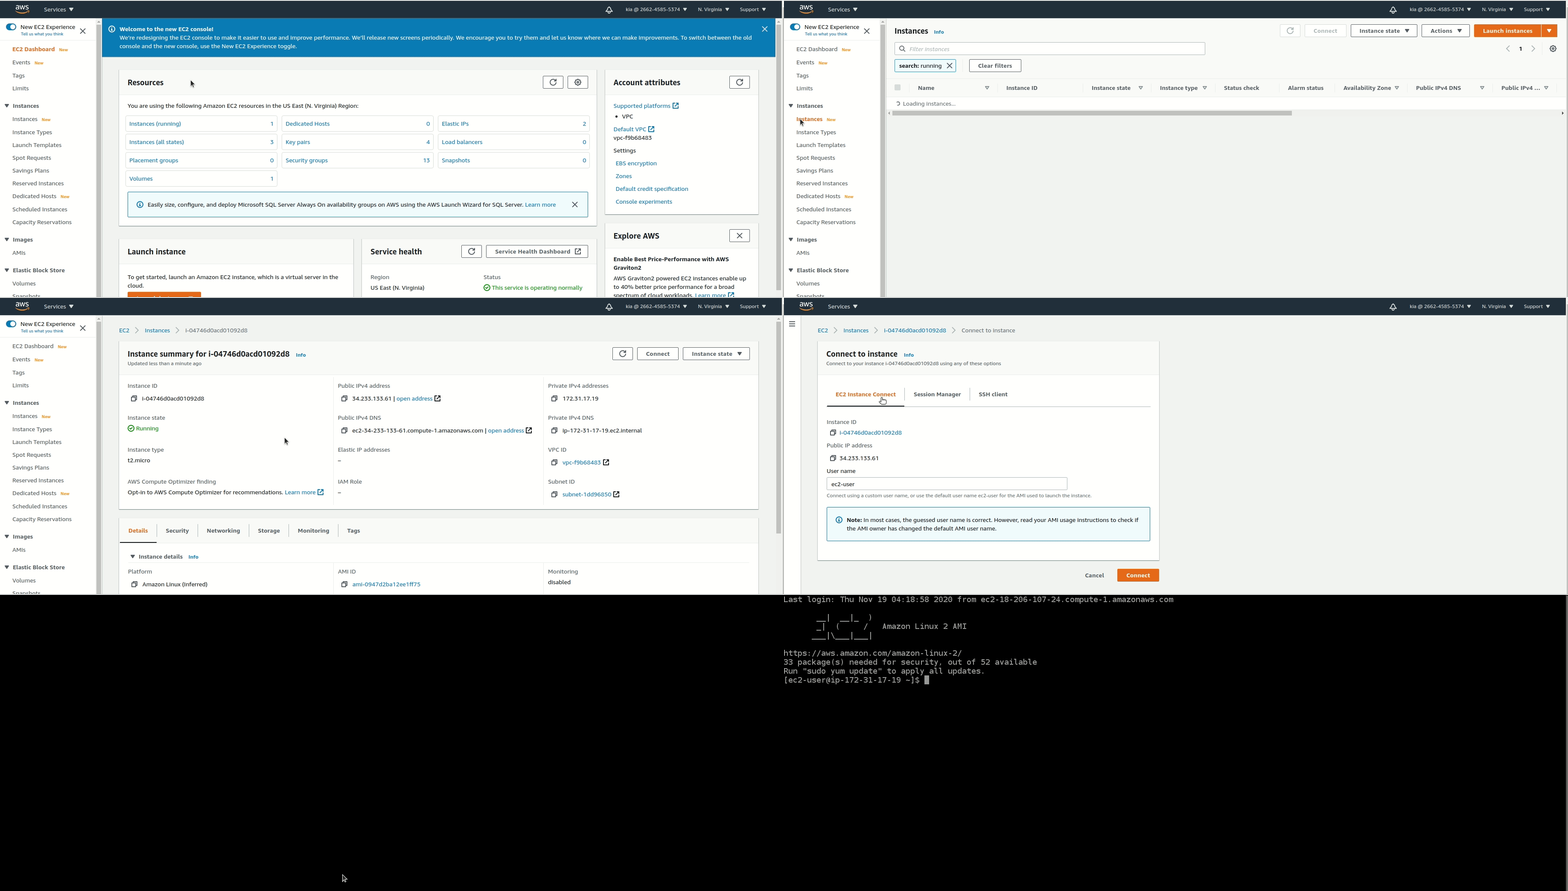
- Navigate back to your instance by clicking
Instanceson the left navigation pane, then click the link underInstance IDagain. - Now we can connect to our instance! Click
Connectin the top right. - Choose
EC2 Instance Connect, then clickConnect. - You should get a screen like the one below in a new browser tab!
Now we are going to take this "blank" EC2 and turn it into a web server with just a few commands. In the browser tab AWS opened for you when you connected, you’ll need to follow the steps and run the commands below.
- Run the command
sudo su- This command will allow you to run all commands as the
root user.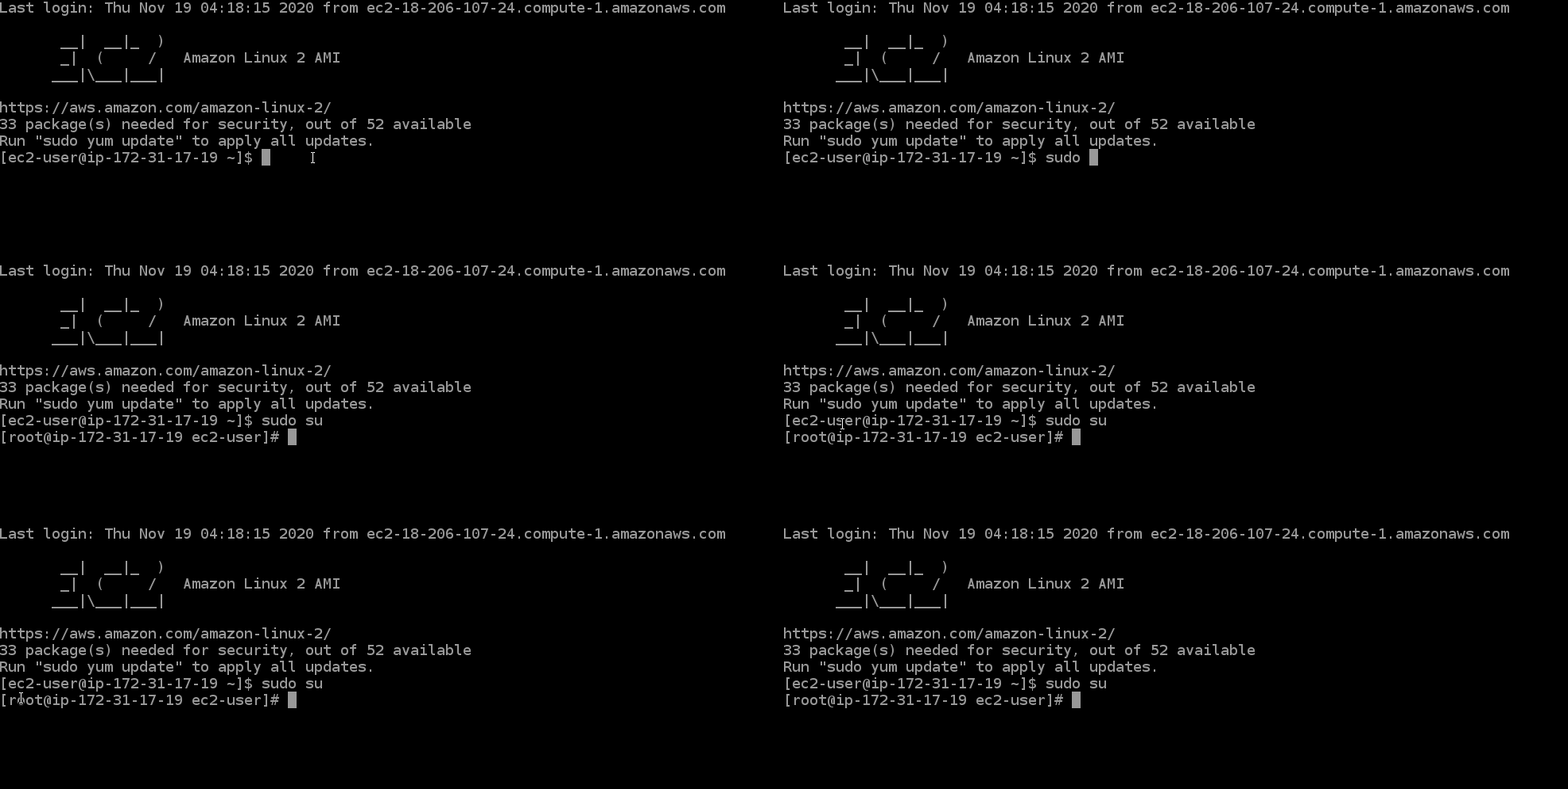
- This command will allow you to run all commands as the
- Run the command
yum install update- This command will install the most updated version of all applications the current EC2 already has.
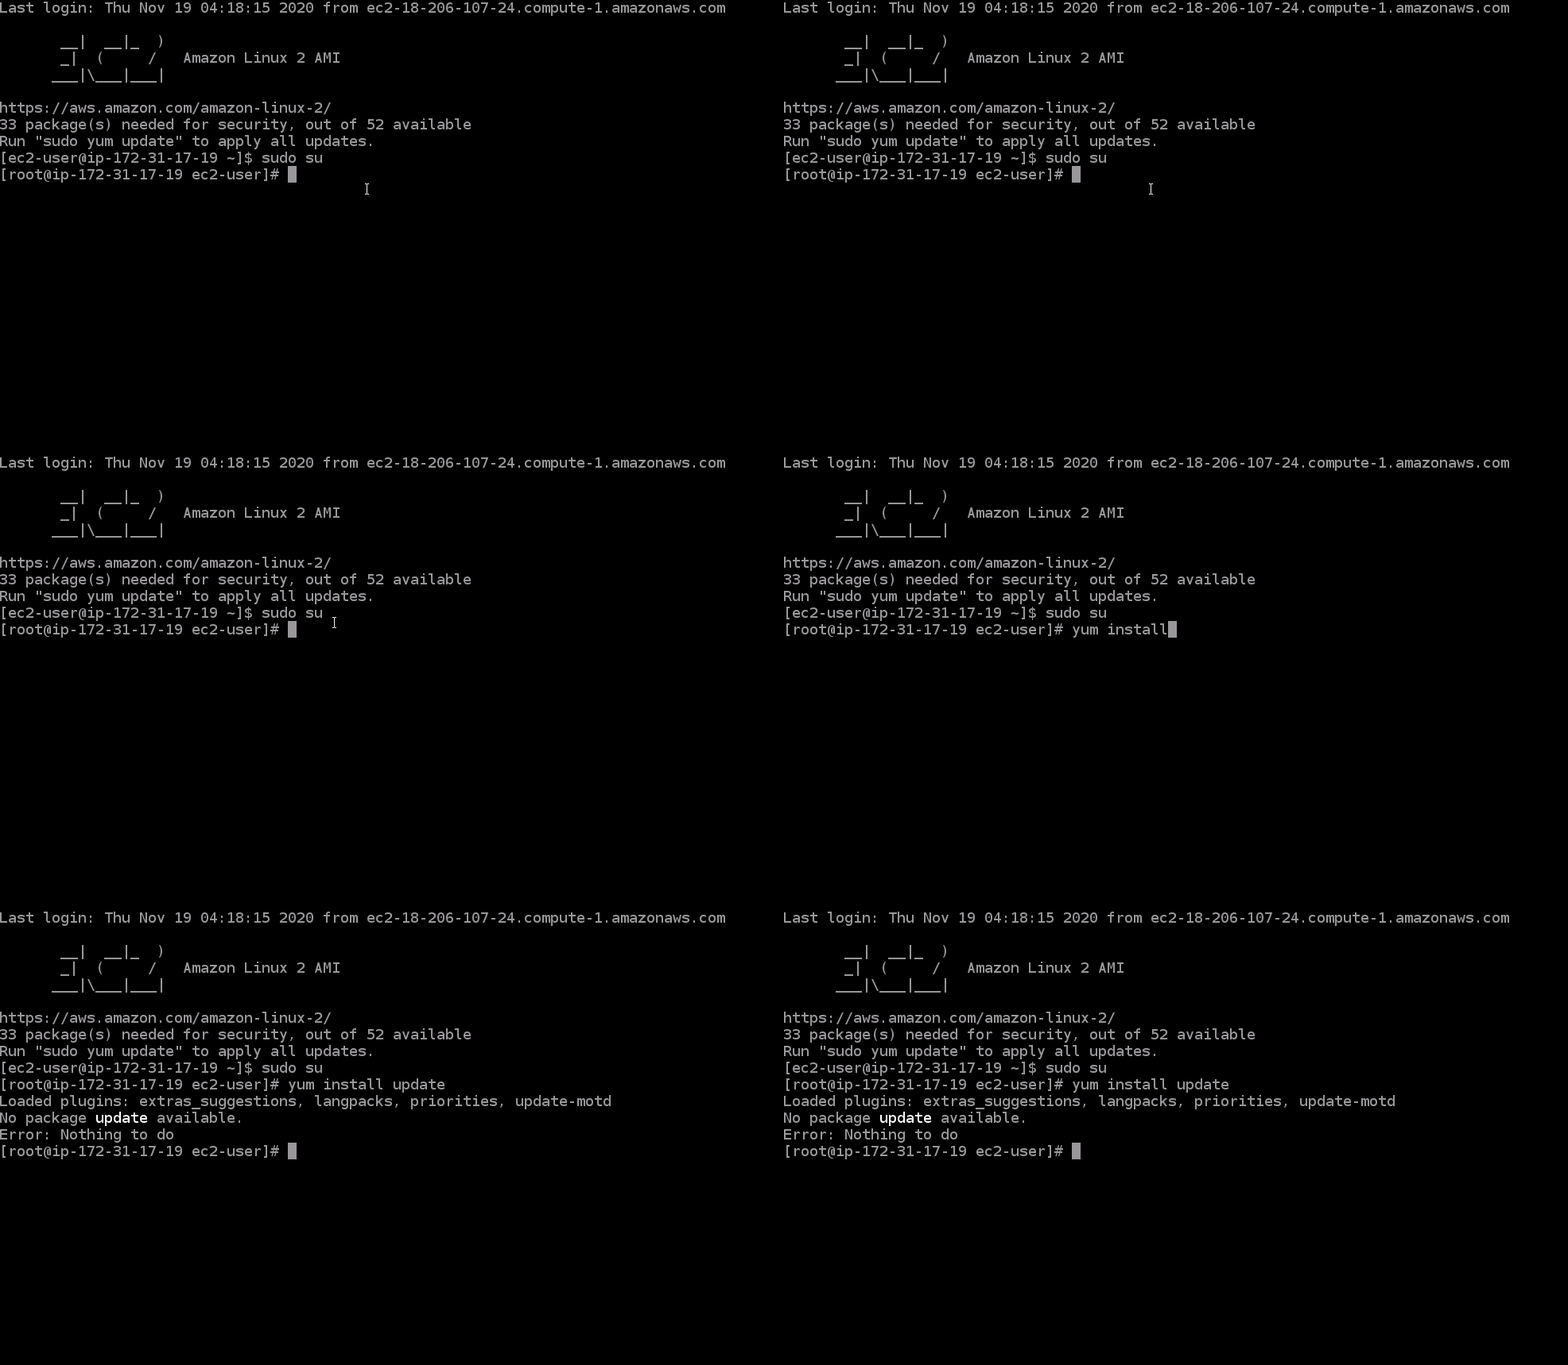
- This command will install the most updated version of all applications the current EC2 already has.
- Run the command
yum install httpd -y- This will install the
webpart of theweb serverwe are creating (it installs an apache web server).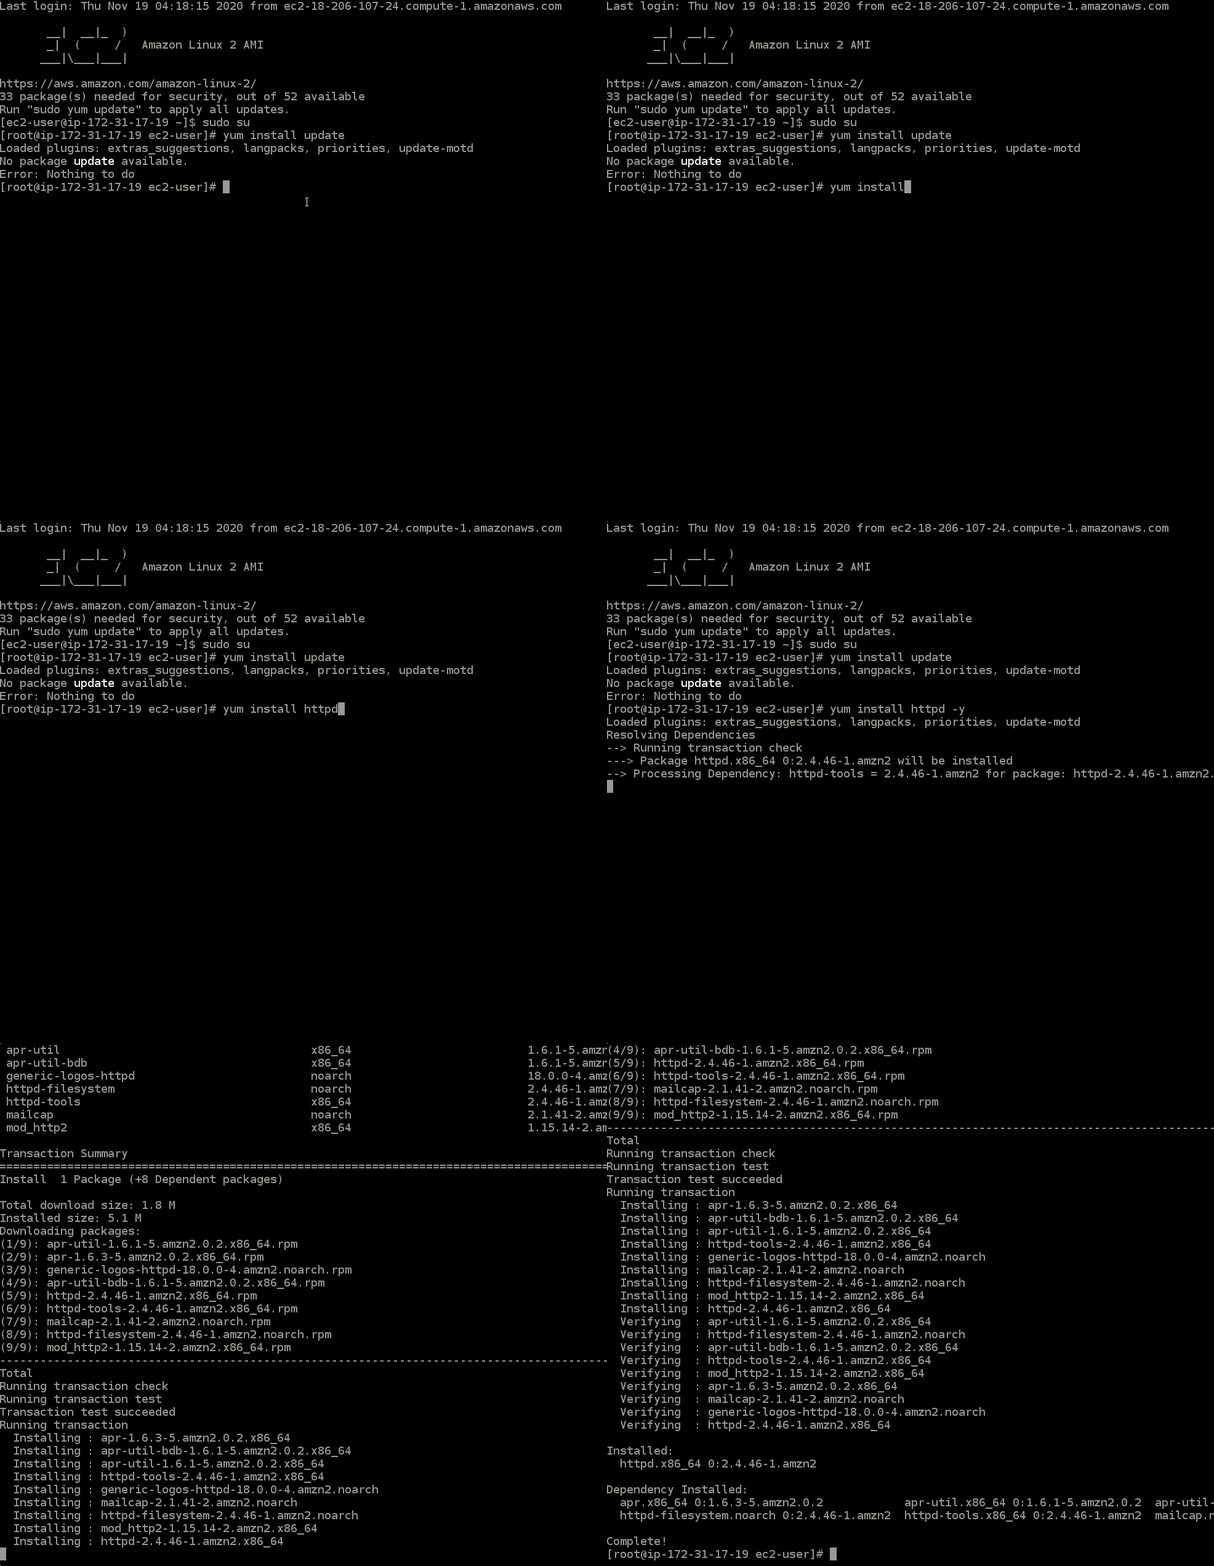
- This will install the
- Run the command
cd /var/www/html/- This command will change into the
htmldirectory created when we ran the previous command.
- This command will change into the
- Run the command
nano index.html- This command will open up the
index.htmlfile so that you can edit it. This is just like opening up a file (word doc, notepad, etc) on your computer to edit, but you’re doing it in theterminal.
- This command will open up the
- Copy the below code into the
index.htmlfile you have open.<html><h1> Hello Worldl! </h1></html> - To exit the file, use the key combo:
crtl + X, then typey(for yes), and hit theenterkey.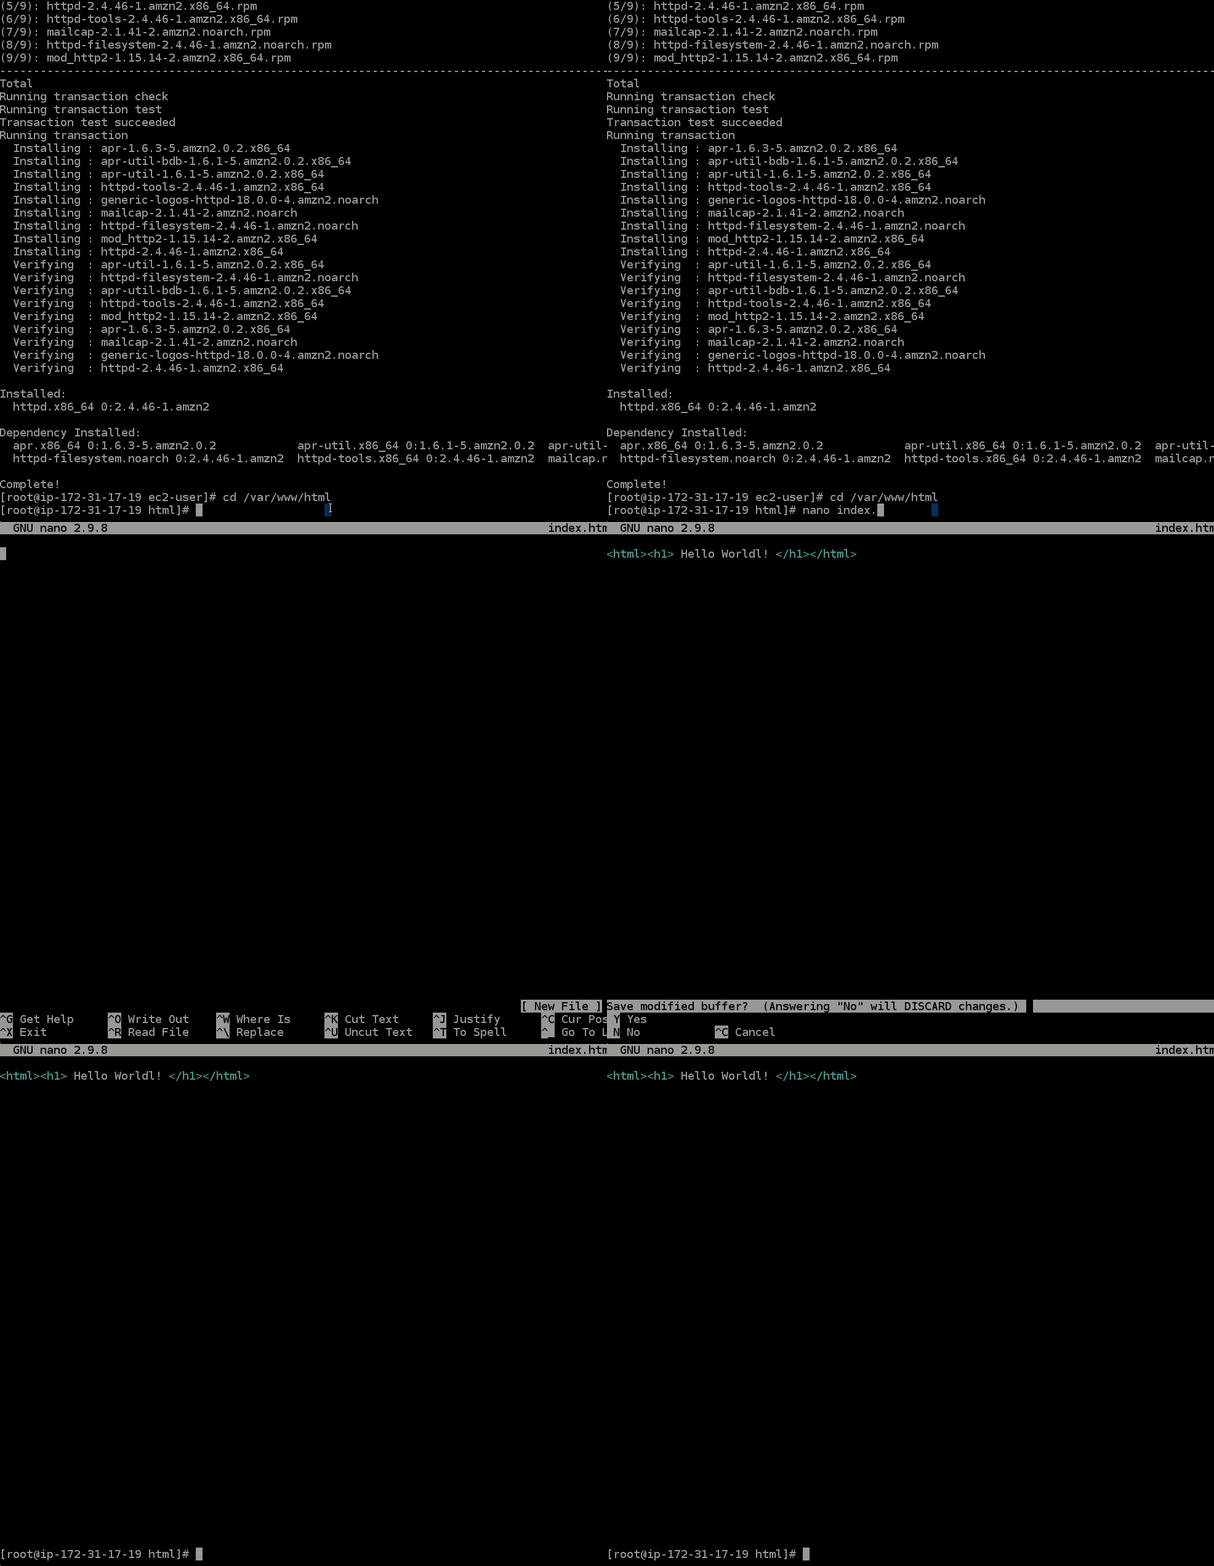
- Run the command
service httpd start- This command will start the web server and allow you to view it in your browser!
- Lastly, you can type
exit(toexittheSSHas the root-user), thenexitagain, (to exit theSSHaltogether). You will no longer be connected to the instance.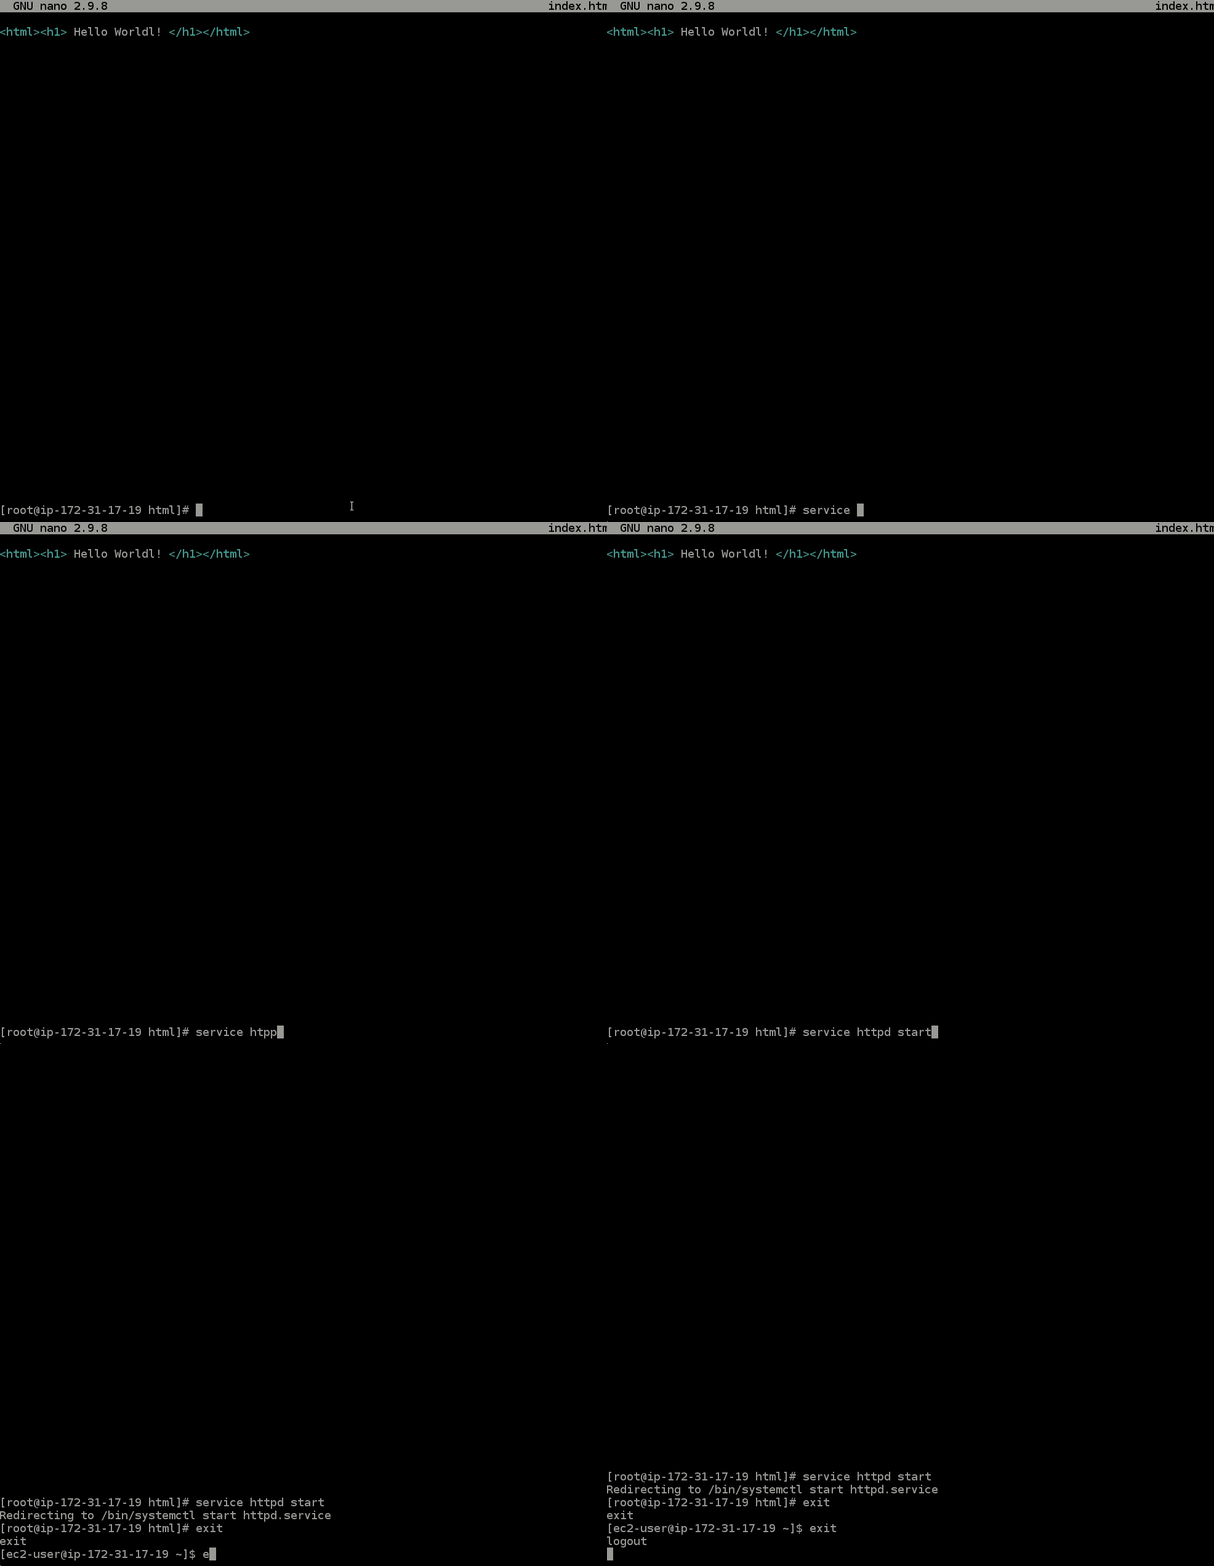
- Now, go back to the
Instances UIand click on you instance. Find thePublic IPv4 addressand copy it, then paste it into a new browser tab. You should see your firstHello World!web server EC2 instance!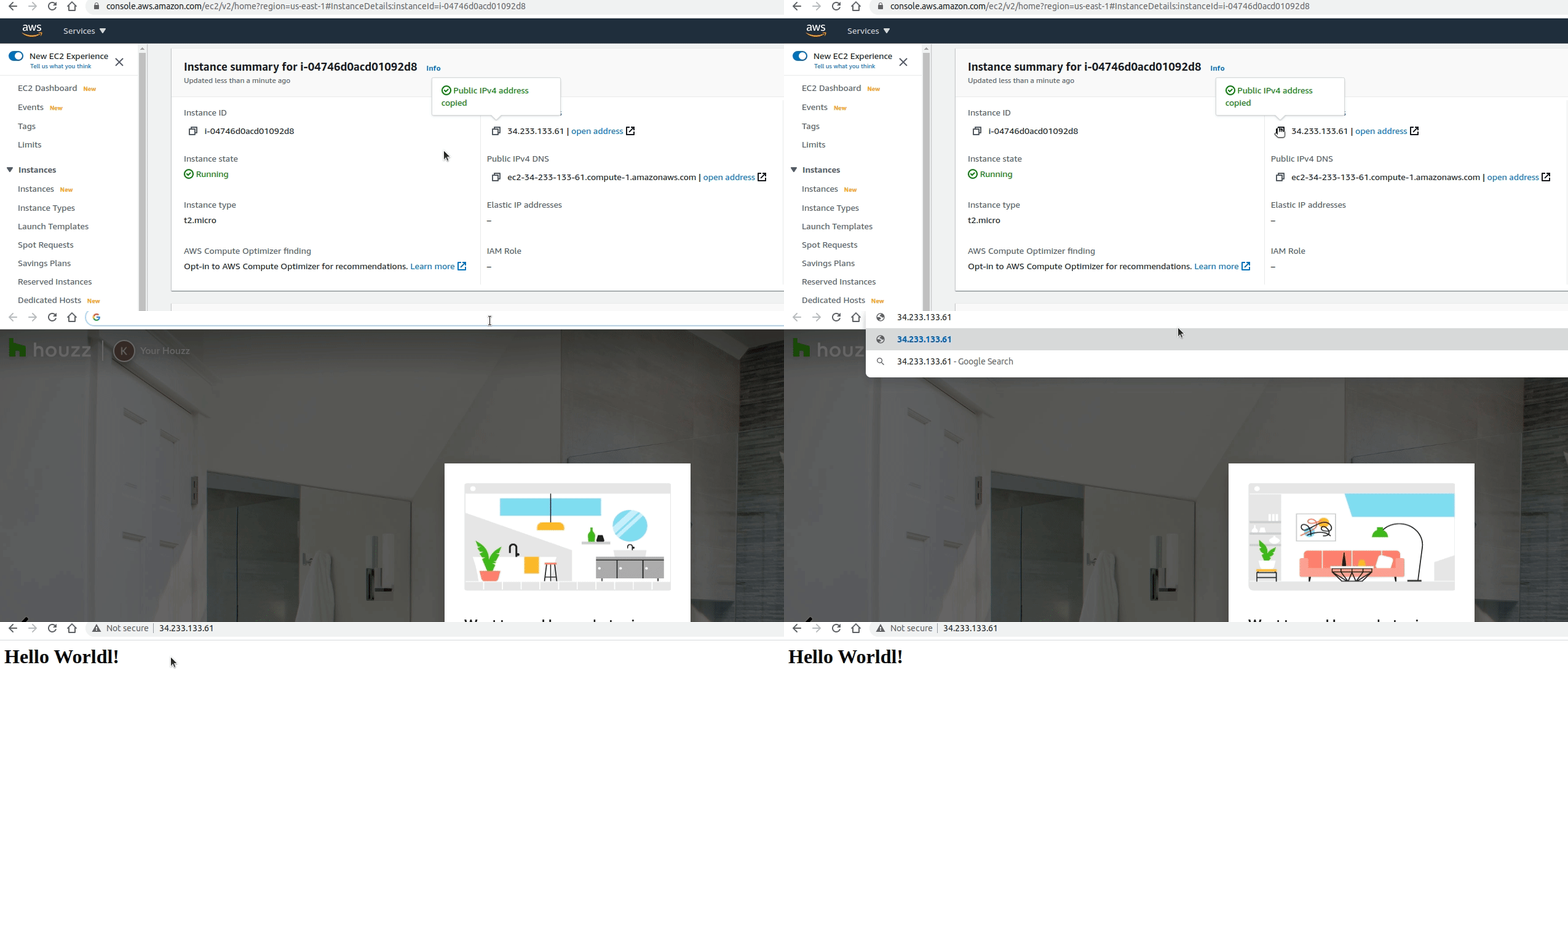
Run terraform destroy
Now that you’ve seen your EC2 in AWS, you should run terraform destroy. It’s always a good idea to clean up after yourself (and terraform makes it easy!) so that you aren’t charged unnecessarily for resources you don’t need running all the time.
- In your
terminal, make sure you are still in yourec2-terraformdirectory by typingpwd. It should print something similar tohome/yourname/ec2-terraform. If you aren’t,cdinto it. - Run the command:
terraform destroy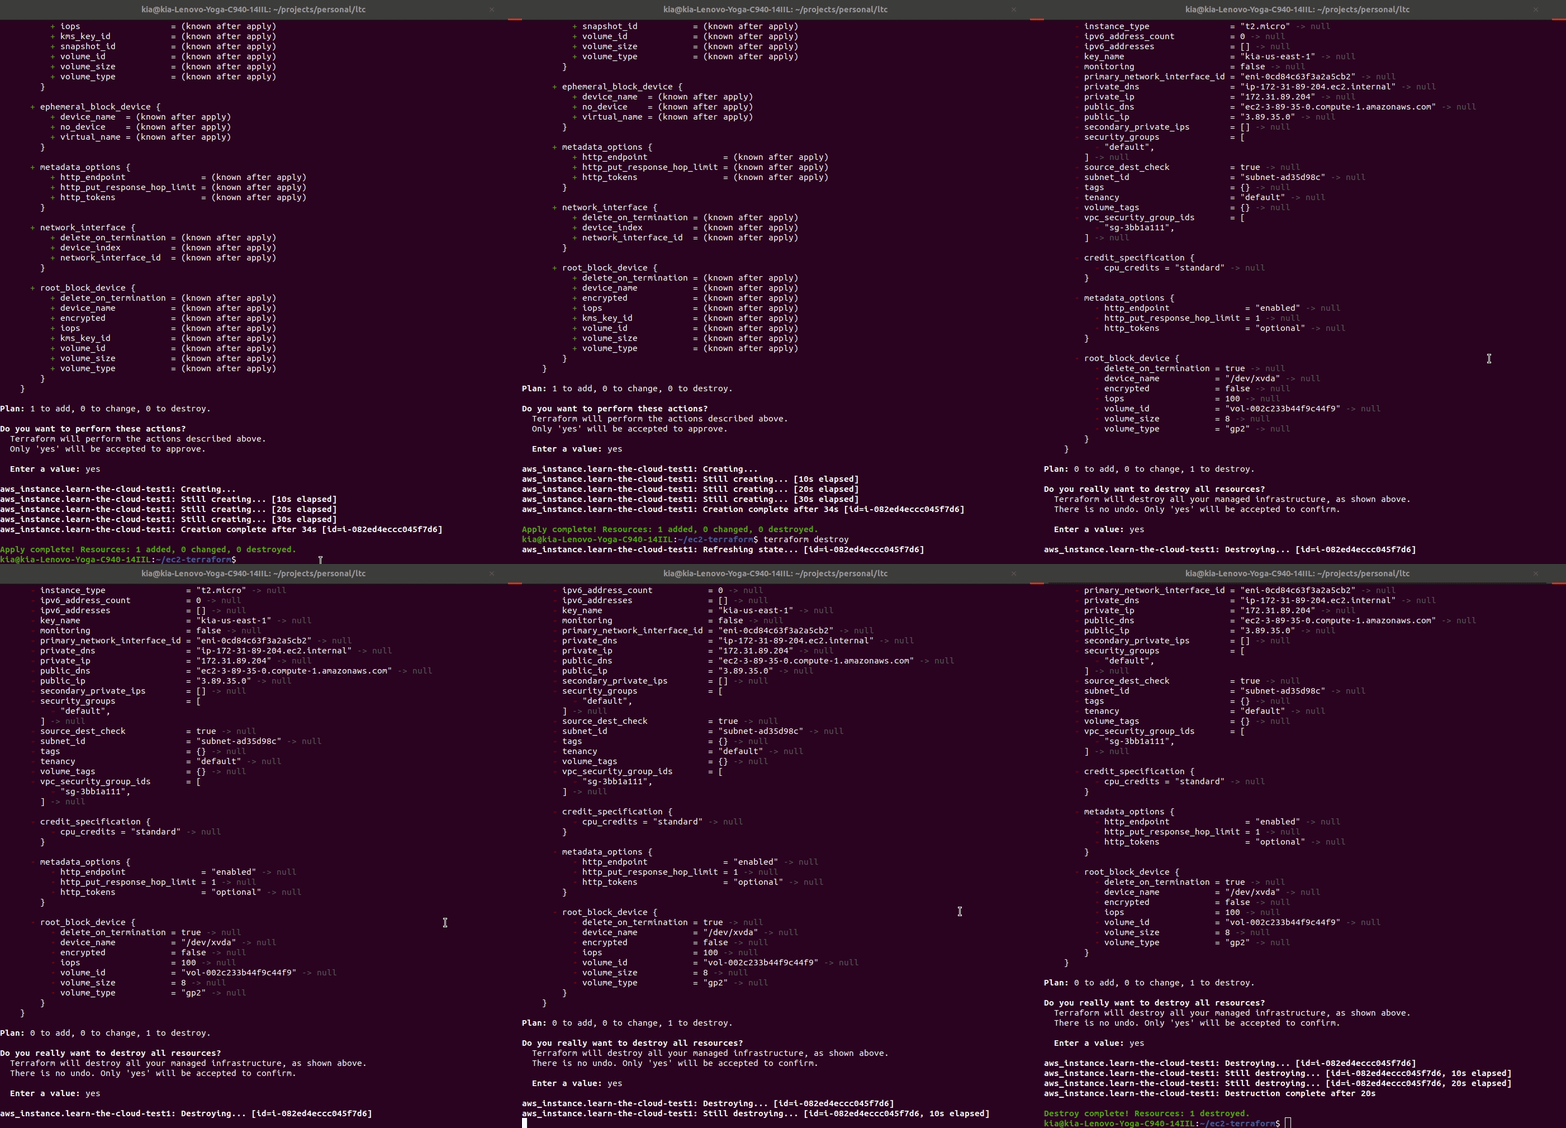
Let’s make a web server - Terraform code
Now that you’ve gotten your hands dirty once, we’re going to let terraform do the heavy-lifting from now on. In the previous example, we SSHed into our instance and manually typed out the commands necessary to turn our EC2 into a web server. With terraform, we can instead create an instance that will launch and run those commands itself!
Add user data to your instance
- Go to your code editor and open up your
ec2-terraformproject. - Open the
ec2.tffile. - In the
"aws_instance"resource, underneath thekey_nameparameter, paste the following new parameter,user_data:user_data = <<-EOF #! /bin/bash yum update -y yum install httpd -y cd /var/www/html echo "<html><h1> Hello! Welcome to Learn the Cloud! </h1></html>" > index.html service httpd start EOFUser datais information (such as a bash script) that will run when you launch an instance. You can enter this user data when you launch an EC2 instance in the AWS Console (on the Configuration step) or by SSHing into the instance and typing out the commands yourself, one by one (like you did previously in this lesson).Note:
EOF: This is how terraform knows that the next information is not a new parameter, but part of the current parameter. You useEOFwhen you need to pass large amounts of text (like something that would be in afile) to a terraform parameter. In this case, we are passing in the content of abash script. You need to start with<<-EOFand end withEOFto tell terraform everything in between should be considered text.Note:
#! /bin/bash: The first line,#! /bin/bash, is the first line of all bash scripts (a bash script is just a set of commands that run consecutively in the terminal). Notice that all the other commands should be familiar, as they are the same ones you ran previously in this lesson.
Run terraform apply
You’ll now need to run terraform apply from your ec2-terraform project directory again. This will launch a new EC2 instance into your AWS account. For full instructions, you can go back to the previous lesson and review.
Now, just like before, you can go back to the Instances UI and click on you instance. Find the Public IPv4 address and copy it, then paste it into a new browser tab. You should see Hello! Welcome to Learn the Cloud! - a web server EC2 instance! 
Run terraform destroy
Now that you’ve seen your EC2 in AWS, you should run terraform destroy. It’s always a good idea to clean up after yourself (and terraform makes it easy!) so that you aren’t charged unnecessarily for resources you don’t need running all the time.
- In your
terminal, make sure you are still in yourec2-terraformdirectory by typingpwd. It should print something similar tohome/yourname/ec2-terraform. If you aren’t,cdinto it. - Run the command:
terraform destroy
Next Steps
In this lesson, you:
- Launched an EC2 instance with terraform
- Updated your security group rules (you’ll learn more about this later, don’t worry!)
SSh-edinto your EC2 instance and ran commands as the root user to set up a web server- Learned how to use user data in terraform to automate #3!
Redo this lesson (optional)
If you would like to try this lesson again to get more comfortable with the process, you’ll need to do one thing:
- Go delete the
user_dataparameter from yourec2.tffile, and save the file.
From there (as long as you ran terraform destroy when the lesson said to) you are good to go!
You can now go back to the start of the Lesson to practice!
Challenge: Instead of Hello World!, make the web server “print”, Hello, YourNameHere!!!.
Move On
If you feel good about this lesson and want to keep moving, go ahead and start on the next Lesson: Variables.