Launch Your First Cloud Server
Lesson 1
Time to create your first virtual computer in the cloud! An EC2 instance is essentially a computer running in Amazon’s data centers that you can control from anywhere. Think of it like renting a computer that lives in the cloud instead of buying one for your desk.
Why use cloud computers? They’re always available, you only pay for what you use, and you can create or delete them instantly. Professional developers use thousands of these to run websites, apps, and services that millions of people use every day.
Important: We recommend working in the us-east-1 region for all exercises, as many of our examples are configured for this region.
Table of contents
- Launch Your First Cloud Server
Understanding Key Pairs (Your Cloud Password)
Before you can access your cloud computer, you need a secure way to log into it. AWS uses something called a “key pair” instead of a regular password.
Think of it this way:
- Your laptop has a password to unlock it
- Your cloud computer has a key pair to unlock it
- Key pairs are much more secure than passwords
Key pair basics:
- You create one key pair per region (like us-east-1)
- You’ll use the same key pair for multiple servers in that region
- AWS gives you a file to download that proves you own the key pair
Create Your First Key Pair
Let’s create the digital key you’ll use to access your cloud servers:
- Log into AWS Console
- Use your bookmark from the AWS Account Setup lesson
- Navigate to Key Pairs
- In the search bar at the top, type “key pairs”
- Click on “EC2” from the results
- Find Key Pairs Section
- On the left sidebar, look for “Network & Security”
- Click “Key Pairs” underneath it
- Create New Key Pair
- Click “Create key pair” button
- Name:
yourname-us-east-1(example:jane-us-east-1) - Format: Select “pem”
- Click “Create key pair”
- Save the Downloaded File
- A
.pemfile will download to your computer - Save it somewhere safe (you’ll need it later to connect to servers)
- A
Setting Up Your EC2 Project
Now let’s build the code that will create your cloud server. You’ll need:
- Your code editor open
- Your terminal open
Create Project Structure
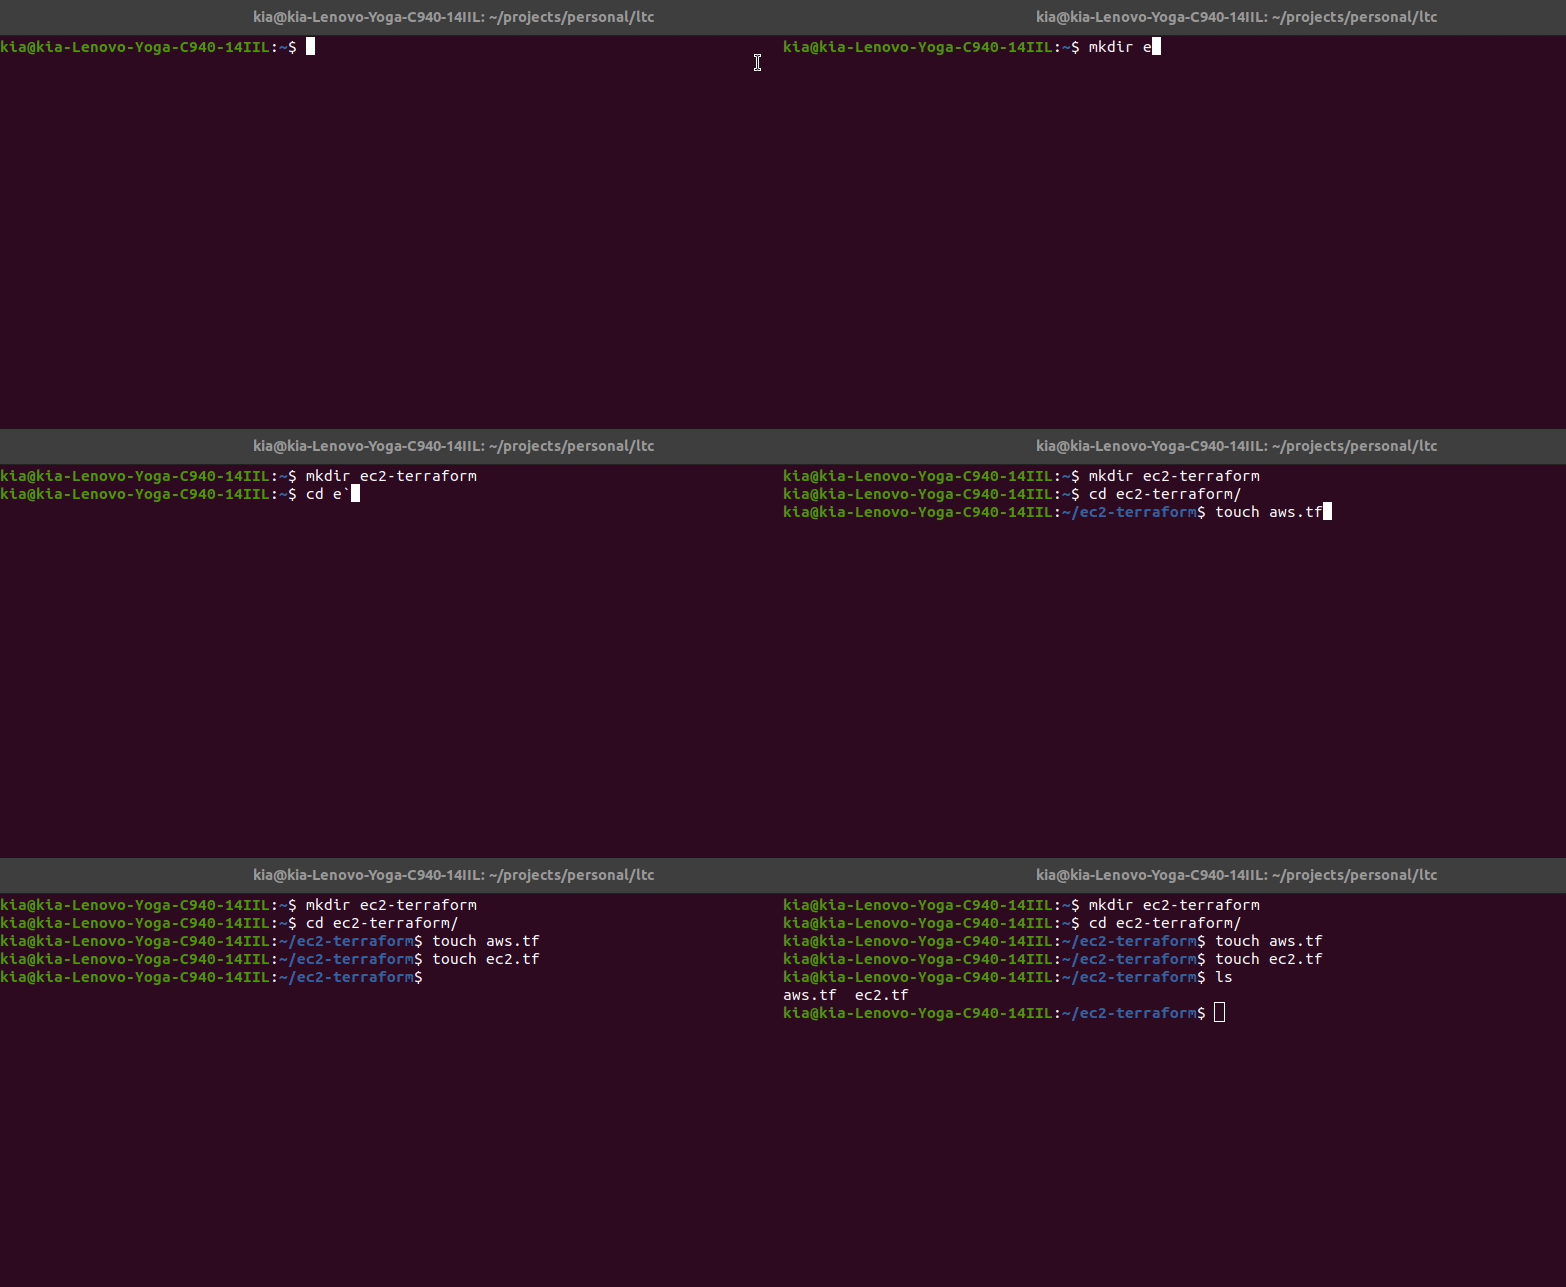
Time to practice your terminal skills! Create a new project with the right files:
Your mission:
- Create a folder called
my-first-ec2 - Create two files inside:
aws.tfandec2.tf
Need help? Click for step-by-step instructions
- Create the project folder:
mkdir my-first-ec2 - Enter the folder:
cd my-first-ec2 - Create the Terraform files:
touch aws.tf ec2.tf - Verify your files exist:
lsYou should see:
aws.tf ec2.tf
Writing Your Infrastructure Code
Now for the exciting part—writing code that creates cloud infrastructure!
Why two files?
aws.tf- Tells Terraform you want to use AWS (not Google Cloud or Microsoft Azure)ec2.tf- Describes the specific server you want to create
Configure AWS (aws.tf)
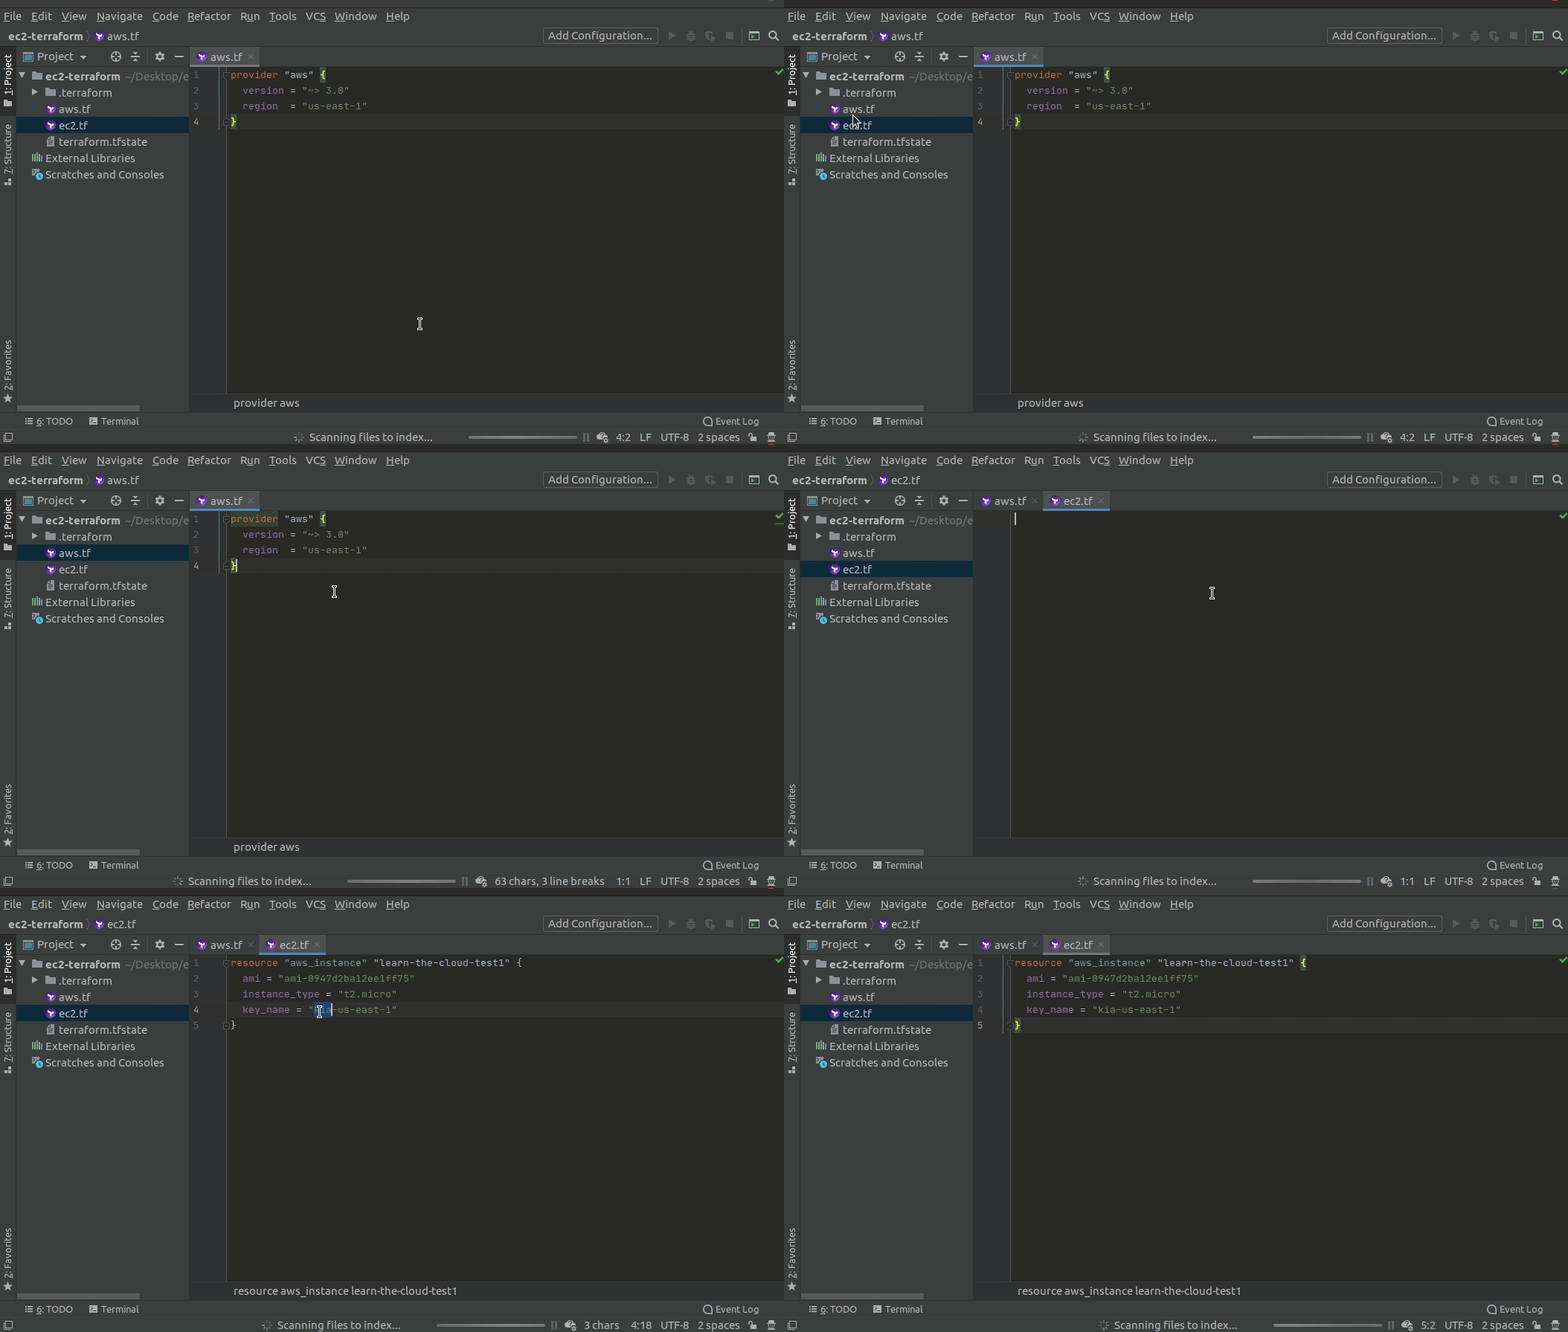
Open aws.tf in your code editor and add:
# Tell Terraform we want to use AWS
terraform {
  required_providers {
    aws = {
      source  = "hashicorp/aws"
      version = "~> 5.0"
    }
  }
  required_version = ">= 1.0"
}

# Configure AWS settings
provider "aws" {
  region  = "us-east-1"  # Virginia data center
  profile = "learn-aws"  # Use the profile we created earlier
}
What this code does:
- Tells Terraform to use AWS (not other cloud providers)
- Sets the region to
us-east-1(Virginia) - Uses your AWS credentials from the earlier setup
Define Your Server (ec2.tf)
Open ec2.tf in your code editor and add:
# Create a virtual server in the cloud
resource "aws_instance" "my_first_server" {
  ami           = "ami-0c02fb55956c7d316"  # Amazon Linux (like Windows vs Mac)
  instance_type = "t2.micro"               # Server size (small, free tier)
  key_name      = "yourname-us-east-1"     # Replace with YOUR key pair name

  # Add labels to identify this server
  tags = {
    Name        = "My-First-Cloud-Server"
    Environment = "Learning"
    Owner       = "Your Name"
  }
}
What this code does:
aws_instance= Creates a virtual computerami= Operating system image (like choosing Windows vs Mac)instance_type= Server size (t2.micro is free tier eligible)key_name= Which key pair to use for accesstags= Labels to help you identify your server in AWS
Remember: Replace yourname-us-east-1 with the exact key pair name you created!
See walk-through
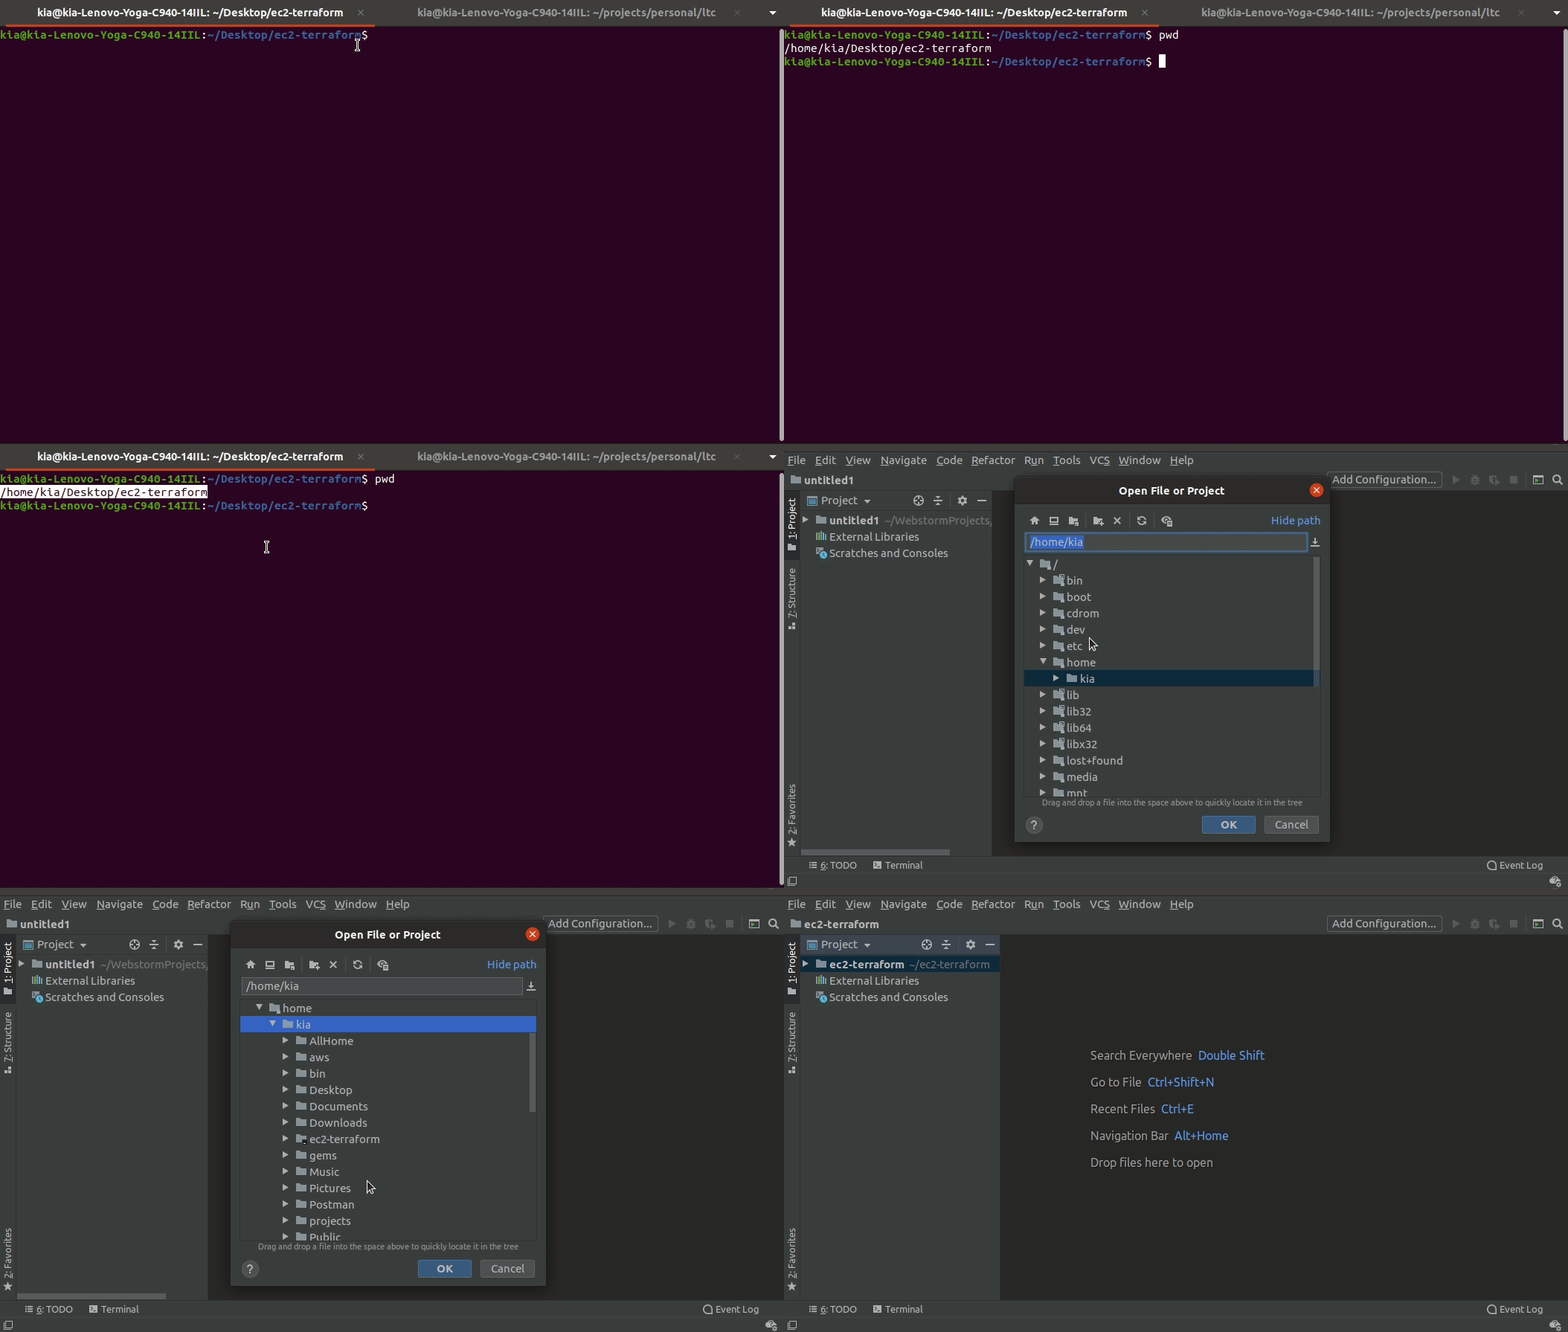
Opening your project in your code editor:
Adding the code to both files:
Deploy Your Server!
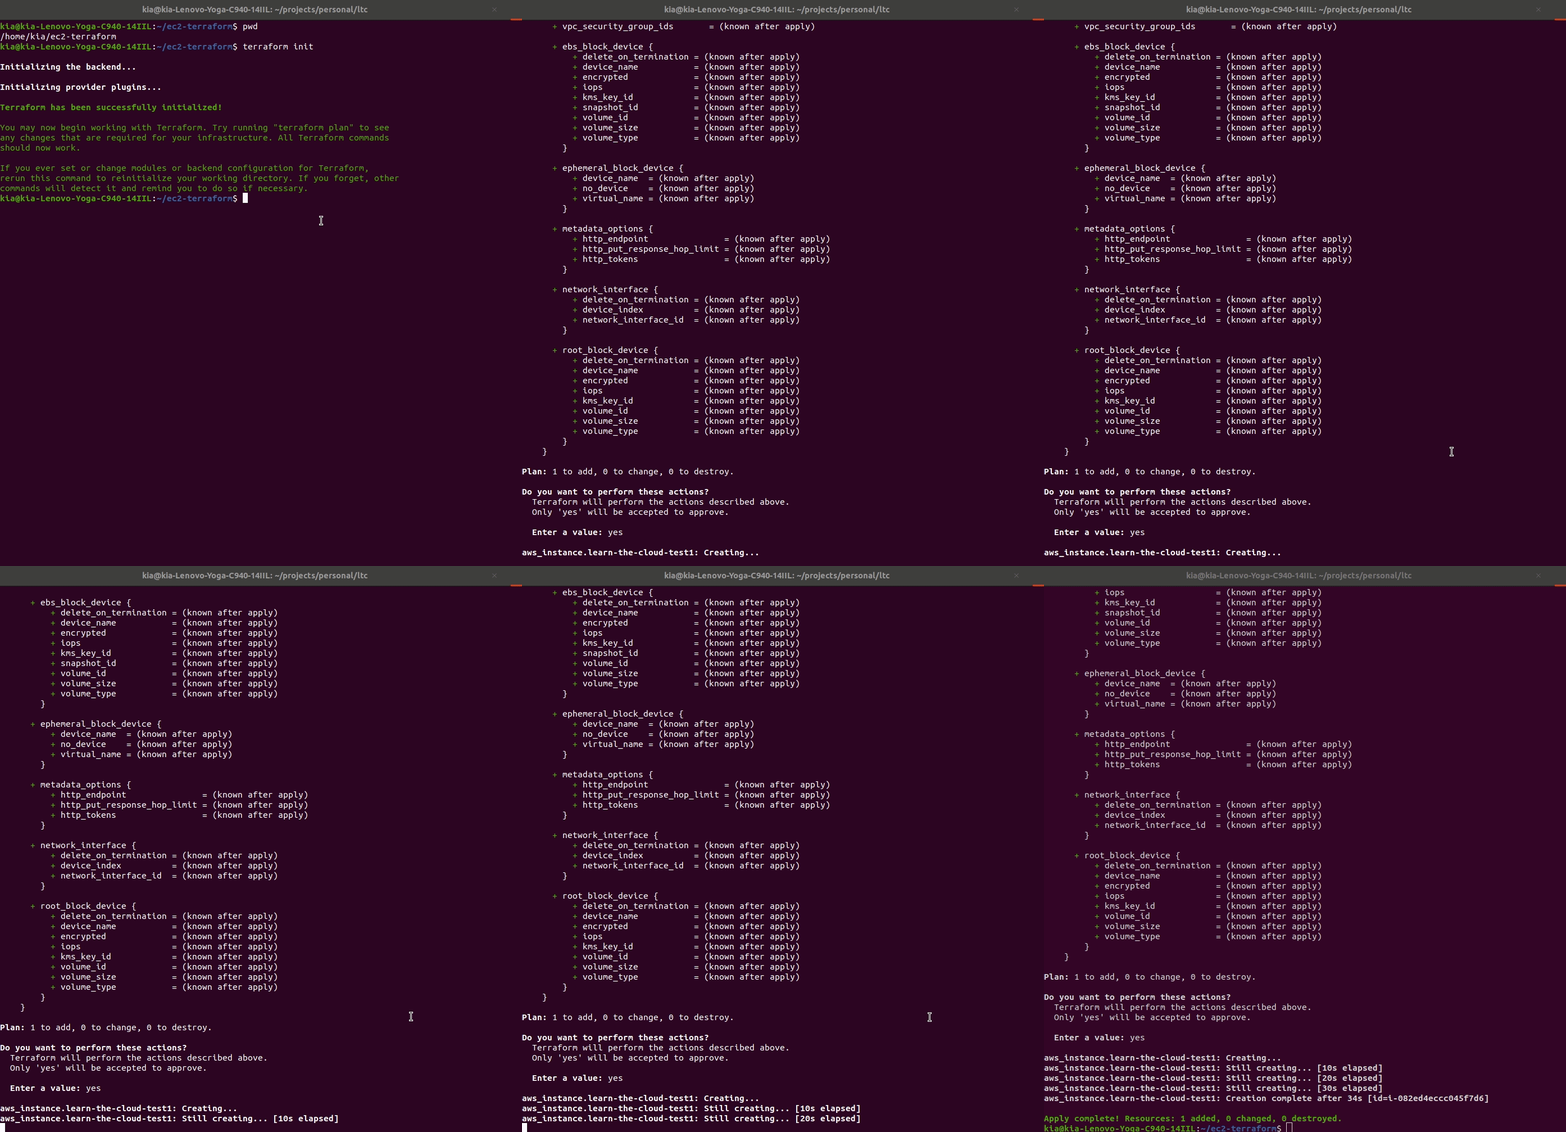
Time to bring your server to life. You’ll use three important Terraform commands:
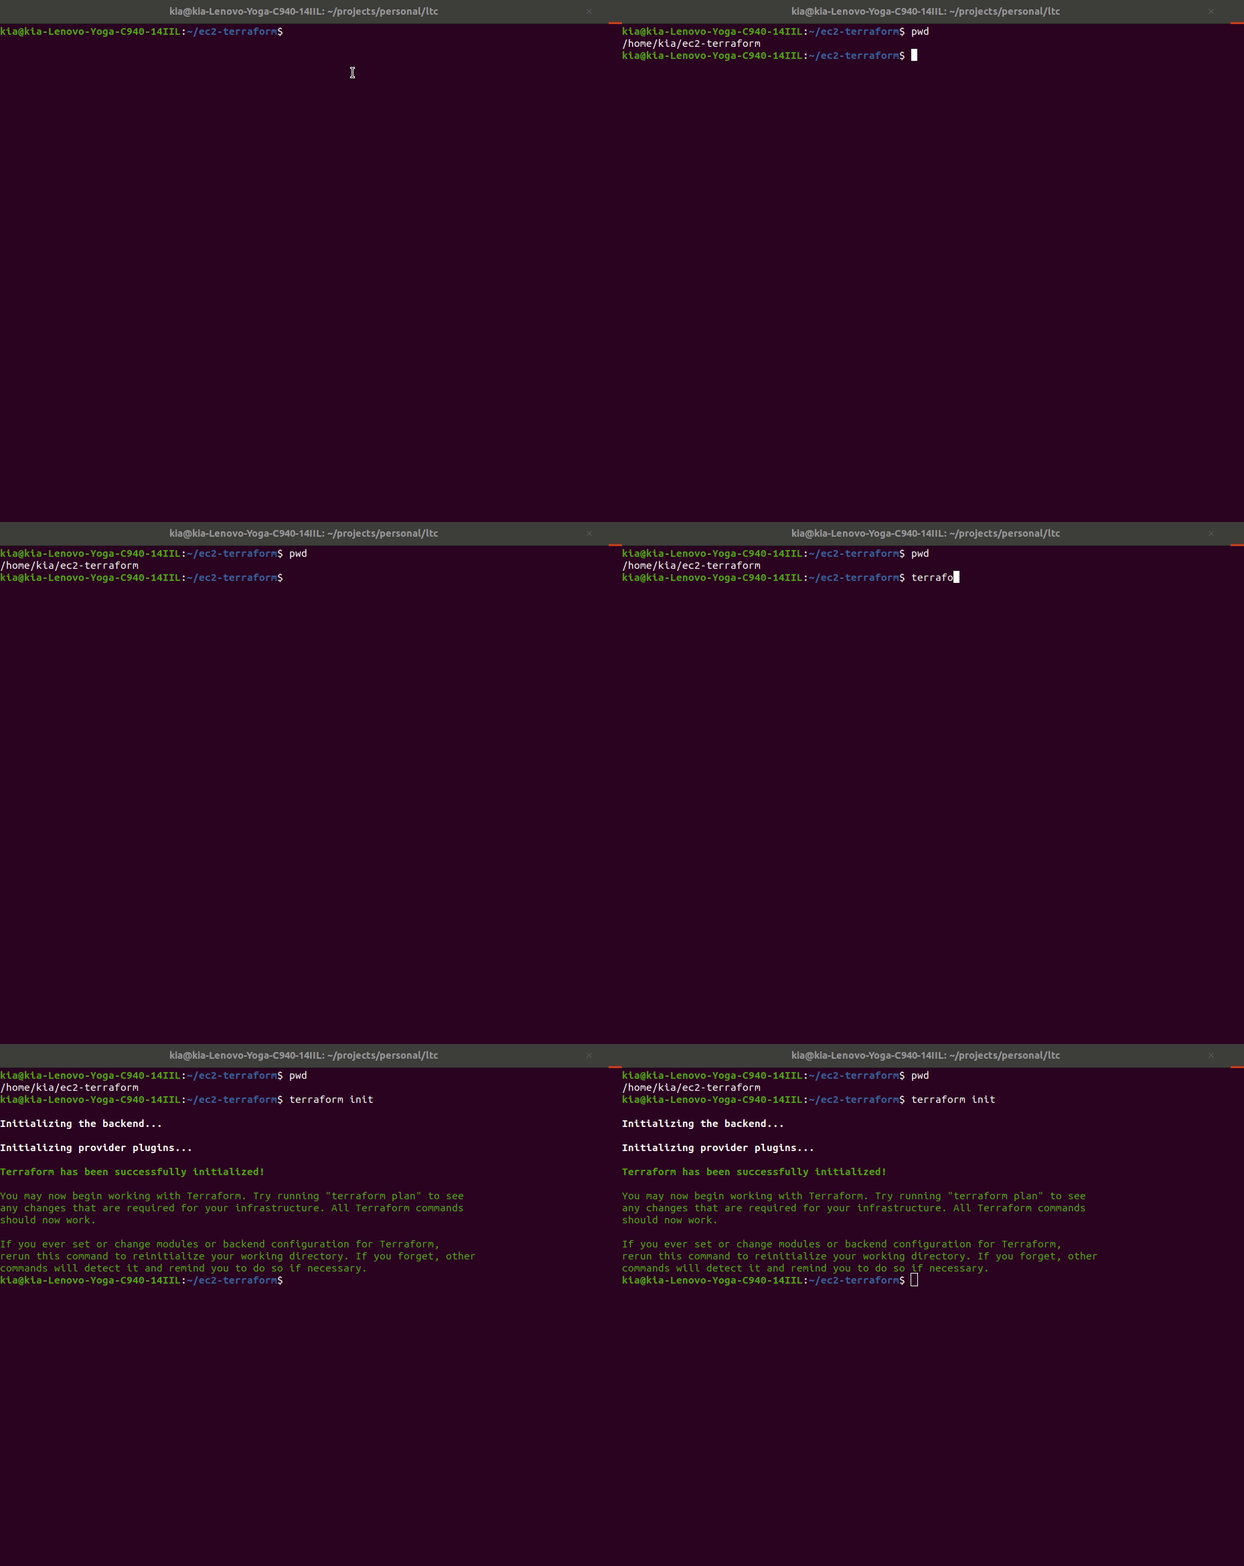
Step 1: Initialize Terraform
First, tell Terraform to set up your project:
# Make sure you're in the right folder
pwd  # Should show: /path/to/my-first-ec2

# Initialize the project
terraform init
What happens: Terraform downloads the AWS plugin and prepares your project.
Step 2: Preview Your Changes
Before creating anything, see what Terraform will do:
terraform plan
What you’ll see:
- A list of resources to be created (marked with
+) - Details about your future server
- No actual changes are made yet
Step 3: Create Your Server
Ready? Let’s create your cloud server:
terraform apply
What happens:
- Terraform shows you the plan again
- It asks for confirmation (type
yes) - It creates your server in AWS
- You get a success message!
Find Your Server in AWS
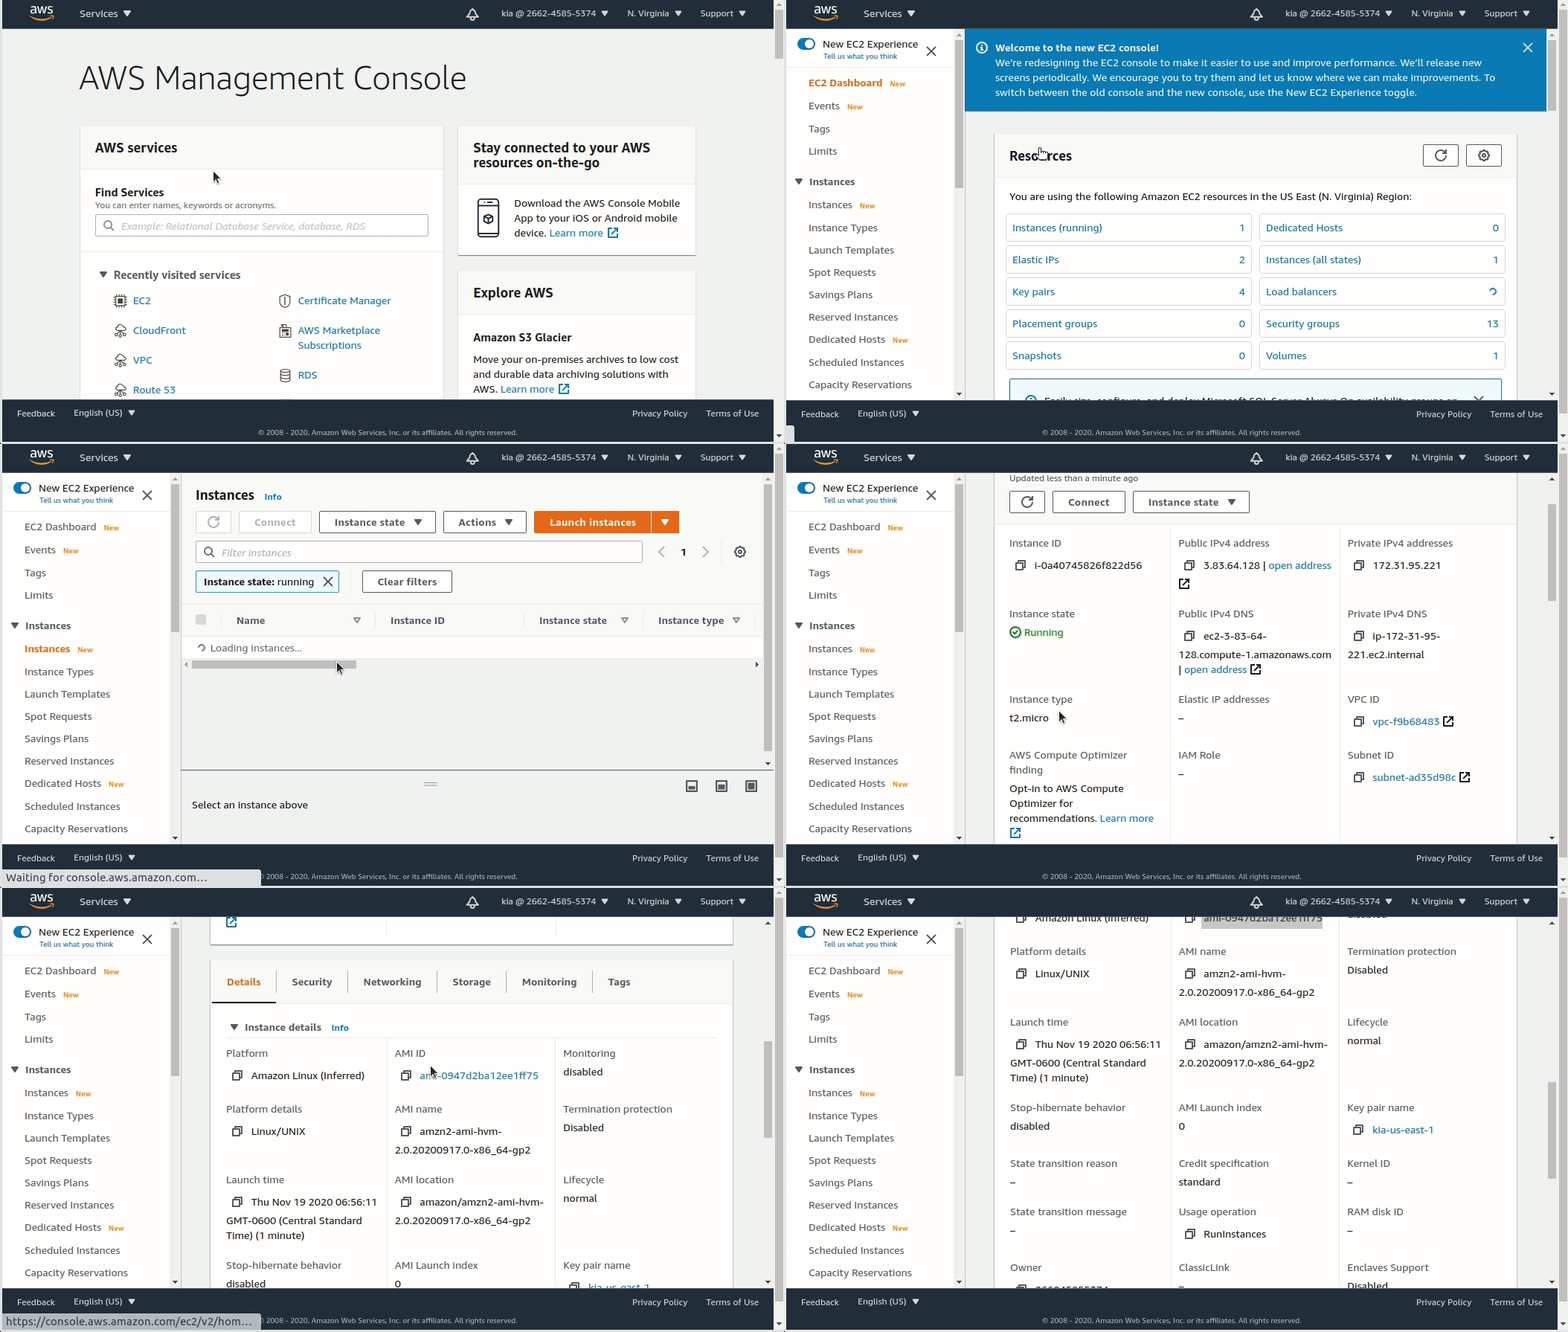
Let’s verify your server was created:
- Go to AWS Console
- Log into your AWS account
- Search for “EC2” in the top search bar
- View Your Instances
- Click “Instances” in the left sidebar
- You should see your server named “My-First-Cloud-Server”
- Check the Details
- Instance type should be
t2.micro - AMI should match what you specified
- Region should be
us-east-1
- Instance type should be
Congratulations! You’ve just created a computer in the cloud using code!
Clean Up (Important!)
AWS charges for running servers, so let’s clean up when you’re done learning:
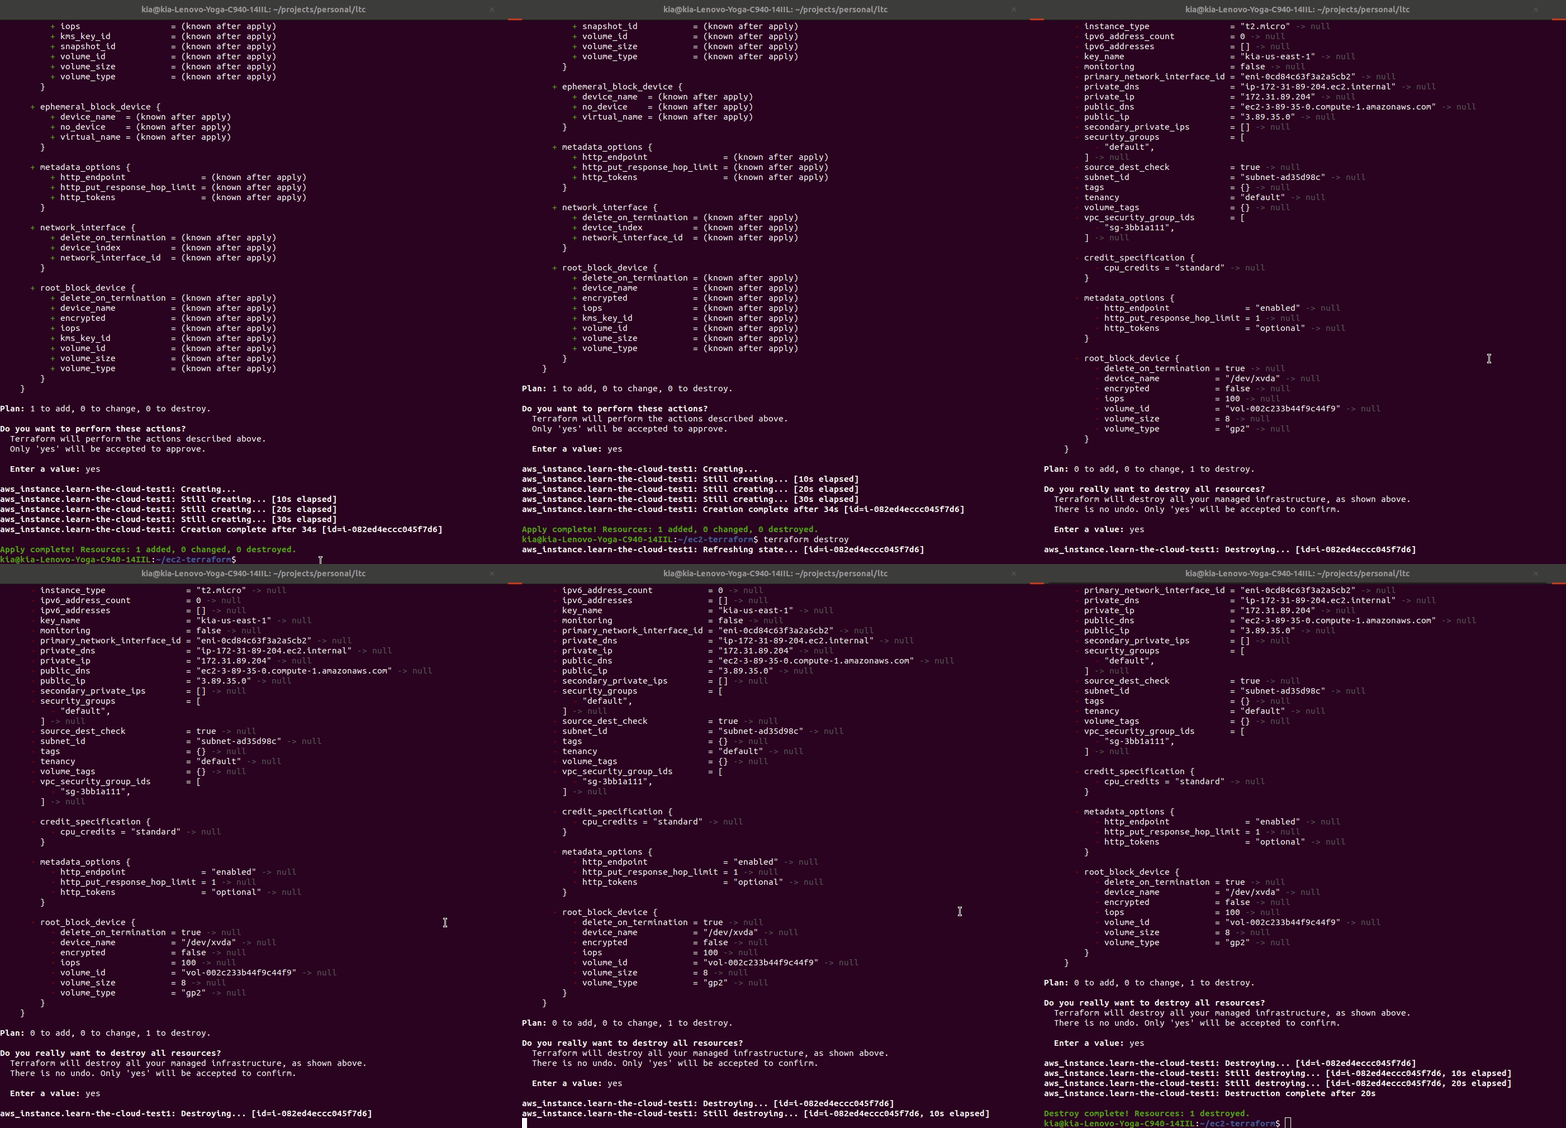
terraform destroy
What happens:
- Terraform lists what it will delete
- Type
yesto confirm - Your server is safely deleted
- No more charges!
Money-saving tip: Always run
terraform destroywhen you’re done with practice exercises. It’s like turning off the lights when you leave a room!
What You’ve Accomplished
✅ Created your first key pair for secure server access
✅ Built infrastructure code with Terraform
✅ Deployed a real server in the AWS cloud
✅ Verified your server in the AWS console
✅ Safely destroyed resources to avoid charges
You’ve just done what professional cloud engineers do every day—defined infrastructure as code and deployed it to production!
Practice Makes Perfect
Want to try again? Here are two ways to practice:
Option 1: Create a New Project
cd ..  # Go back to parent directory
mkdir my-second-ec2
cd my-second-ec2
# Start the lesson again with new folder
Option 2: Start Fresh
cd ..  # Go back to parent directory
rm -rf my-first-ec2  # Delete everything
# Start the lesson from the beginning
Next Steps
Ready to make your server do something useful? Head to Web Server EC2 where you’ll create a server that serves web pages to the internet!
Remember: The more you practice these basics, the more natural they become. Don’t worry about memorizing everything—focus on understanding the process.